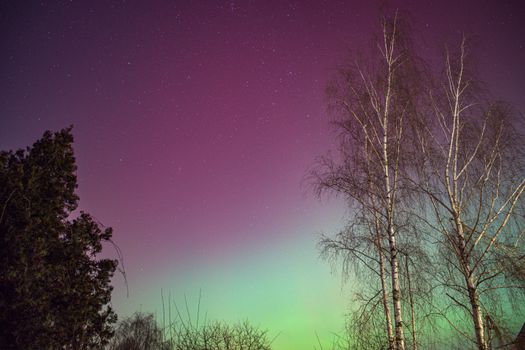
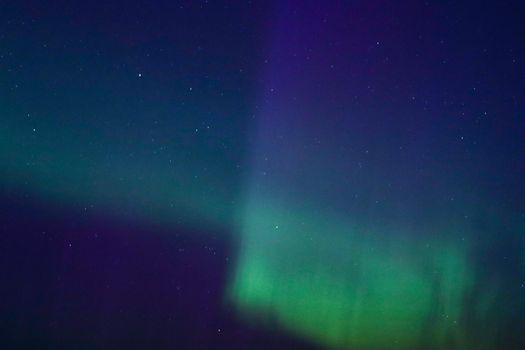
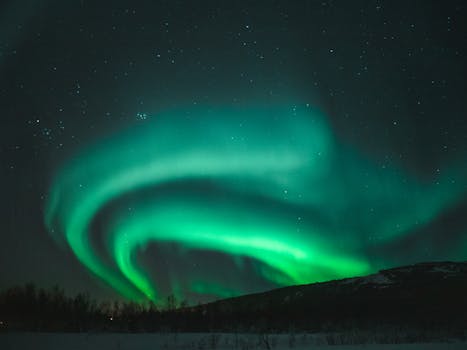
The frigid air bit at my cheeks, but I barely noticed. My gaze was fixed upwards, lost in a cosmic ballet of greens, purples, and faint reds that writhed across the inky canvas of the Arctic sky. It was my third night chasing the aurora in a remote corner of Finnish Lapland, far from any light pollution, and this display was unlike anything I’d ever witnessed. The sky wasn't just lit; it was alive, pulsating with an energy that vibrated through the crisp silence.
My camera, already set on its sturdy tripod, clicked away, each long exposure etching this ephemeral beauty onto its sensor. I remember thinking, in that moment of pure, unadulterated awe, that this was the real Northern Lights experience – raw, isolated, and utterly profound.
Lately, though, I’ve noticed a shift. The aurora borealis, once a mystical, elusive phenomenon known only to intrepid adventurers, is rapidly becoming a bucket-list staple for everyone. Tour buses are getting bigger, prime viewing spots are getting more crowded, and the sheer volume of "how to photograph the Northern Lights" articles suggests that soon, everyone will have a similar shot.
And that, my fellow Tripsora explorer, is precisely why we need to talk. This isn't just about snapping a pretty picture; it's about capturing the soul of the aurora, finding those untouched moments, and creating images that stand apart. It's about getting ahead of the curve, finding unique perspectives, and mastering the craft before the magic becomes, well, mainstream.
So, grab your warmest layers, charge your batteries, and prepare to embark on an adventure that promises not just stunning photographs, but an unforgettable communion with one of Earth’s greatest spectacles.
---
Section 1: The Aurora Chase – More Than Just Luck
Let's dispel a common myth: chasing the Northern Lights isn't just about showing up in the Arctic and hoping for the best. While luck certainly plays a role, understanding the science behind the aurora and knowing how to predict its appearance significantly boosts your chances of success. Think of it as a cosmic weather forecast – you wouldn't go hiking without checking the weather, right?
The aurora borealis is caused by solar particles interacting with Earth's magnetic field and atmosphere. The key ingredient here is solar activity, which is measured by the KP index (ranging from 0 to 9). A higher KP index means a stronger, more widespread aurora. While a KP of 3 might give you a decent show in the far north, a KP of 5 or higher could mean seeing it further south, and with incredible intensity.
When to Go:
* Season: Your best bet is between late autumn and early spring (September to April). During these months, the nights are long and dark enough to see the aurora. The peak months often fall around the equinoxes (September and March) due to increased geomagnetic activity.
* Time of Night: The aurora can appear anytime after dusk and before dawn, but it's often most active between 10 PM and 2 AM. However, I've had incredible displays at 4 AM and surprise bursts right after sunset. Patience is paramount.
* Weather: This is non-negotiable. You need clear skies. Even a KP 9 forecast is useless if heavy cloud cover blankets the sky. Constantly check local weather forecasts and satellite imagery. Look for gaps in the clouds.
Tools of the Trade (Prediction Apps & Websites):
* My Aurora Forecast (App): This is my go-to. It provides real-time KP index, cloud cover maps, and even tells you the best places to see the aurora nearby.
* Space Weather Live (Website): For the more serious aurora chaser, this site offers detailed solar wind data, magnetograms, and long-range forecasts.
* Local Tour Operators: Often have the most up-to-date local knowledge on cloud patterns and potential viewing spots.
My first aurora chase was a brutal lesson in patience. I spent three nights in Iceland, bundled in layers, staring at an overcast sky. On the fourth night, just as I was about to give up, a tiny sliver of sky opened up, and for a glorious 15 minutes, a faint green ribbon danced. It taught me that persistence, even in the face of disappointment, often pays off.
---
Section 2: Beyond the Postcard – Finding Your Untouched Vantage Point
This is where we differentiate ourselves. While iconic spots like Jökulsárlón Glacier Lagoon in Iceland or Abisko in Sweden are undeniably beautiful, they often come with crowds, light pollution, and the risk of taking a shot that's virtually identical to thousands of others. Our goal is to find solitude, unique compositions, and that raw, untamed feeling.
Why Go Off-Grid?
* No Light Pollution: Artificial lights dull the aurora's vibrancy and introduce unwanted orange/yellow casts. The darker the sky, the more vivid the aurora.
* Unique Compositions: No busloads of tourists in your frame, no footprints in the pristine snow, just you and the wilderness. This allows for truly original shots.
* Authentic Experience: There’s something profoundly moving about witnessing the aurora in complete silence, with only the vast wilderness as your companion.
Where to Find Solitude (Tripsora's Insider Picks):
- Finland – Wild Lapland: Forget Rovaniemi. Head further north to regions like Pallas-Yllästunturi National Park or the vast areas around Inari and Utsjoki. These areas boast some of Europe's darkest skies. Consider renting a cabin deep in the forest or even a glass igloo (some are more secluded than others).
- Details: Expect to drive. Rental cars are essential. Local guides in these areas often specialize in small, bespoke tours rather than large groups. Prices for guided tours can range from €150-€400 per person for an evening, depending on exclusivity and duration.
- Norway – The Lyngen Alps & Senja: While Lofoten is stunning, it's increasingly popular. For a more rugged, less-traveled experience, explore the Lyngen Alps near Tromsø or the majestic island of Senja. These locations offer dramatic fjords, snow-capped peaks, and incredibly dark skies.
- Details: Senja requires a ferry or a longer drive. Accommodation can be found in charming fishing villages. Consider a multi-day dog sledding or snowmobiling tour into the backcountry for ultimate isolation.
- Canada – Yukon & Northwest Territories (Beyond Yellowknife): Yellowknife is a known aurora hub, but venture beyond its immediate surroundings. The vast wilderness of the Yukon (around Whitehorse, but then drive further) or the Northwest Territories offers unparalleled solitude. Think ice roads, frozen lakes, and endless forests.
- Details: This is a serious expedition. Expect higher costs for flights and specialized winter vehicle rentals. Local First Nations guides offer incredible cultural insights and access to remote viewing areas. A multi-day guided trip here could easily run into thousands of dollars, but the experience is priceless.
- Alaska – Denali's Backcountry: Fairbanks is Alaska's aurora hotspot, but to truly escape, consider a winter trip towards or into the fringes of Denali National Park (accessible parts) or even further north towards the Arctic Circle via the Dalton Highway (requires specialized vehicle and preparation).
- Details: Extreme cold is a factor. Lodge stays further from towns offer the best chances. Self-driving requires significant winter driving experience.
Pro-Tip:
Scout locations during daylight hours. Look for interesting foreground elements – a lone tree, a frozen river bend, an old cabin – and identify potential light pollution sources. This saves precious time in the dark.
One unforgettable night in Senja, Norway, I hiked to a remote beach, the only sound the gentle lapping of waves against the snow-dusted rocks. As the aurora exploded overhead, its reflection shimmered in the water, creating a mirror image of the heavens. It was a moment of profound solitude and beauty, a shot I knew no one else would have.
---
Section 3: Your Aurora Arsenal – Gear That Matters (and How to Use It)
You can't capture magic with inadequate tools. While your phone might grab a faint green smudge, truly breathtaking aurora photography requires specific gear and a solid understanding of how to use it in extreme conditions.
The Essentials:
- Camera Body: Full-Frame or Crop-Sensor DSLR/Mirrorless with Good Low-Light Performance.
- Why: You need a camera that handles high ISOs well, minimizing noise. Full-frame sensors generally excel here.
- Examples: Sony A7SIII, A7RIV, Nikon Z6/Z7/D850, Canon EOS R6/R5/5D Mark IV. Even a solid crop-sensor like a Fujifilm X-T4 or Nikon D500 can do a fantastic job.
- Lens: Wide-Angle, Fast Aperture (f/2.8 or wider is ideal).
- Why: A wide angle (14-24mm for full-frame, 10-18mm for crop-sensor) allows you to capture the vastness of the sky and include foreground elements. A fast aperture (f/2.8, f/1.8, f/1.4) lets in maximum light, allowing for shorter shutter speeds and lower ISOs.
- Examples: Sigma 14-24mm f/2.8, Sony 20mm f/1.8, Laowa 15mm f/2, Nikon 14-24mm f/2.8, Rokinon/Samyang 14mm f/2.8 (manual focus, but excellent value).
- Sturdy Tripod:
- Why: Long exposures are impossible without a stable platform. Don't skimp here; a flimsy tripod will lead to blurry shots. Carbon fiber is lighter for hiking.
- Tip: Test its stability in windy conditions.
- Remote Shutter Release (Wired or Wireless):
- Why: Pressing the shutter button directly can introduce camera shake, blurring your long exposure. A remote prevents this.
- Extra Batteries (and keep them warm!):
- Why: Cold temperatures drastically reduce battery life. I carry at least 3-4 spares, keeping them in an inside pocket close to my body.
- Tip: Always start with a fully charged battery.
- Headlamp with Red Light Mode:
- Why: Essential for navigating in the dark. Red light preserves your night vision, which is crucial for seeing the aurora and adjusting settings without blinding yourself or others.
- Warm Clothing (Layers, Layers, Layers!):
- Why: You'll be standing still in sub-zero temperatures for extended periods. This isn't photography; it's survival.
- Must-Haves: Thermal base layers, fleece mid-layers, down jacket, waterproof/windproof outer shell, insulated pants, heavy-duty insulated boots (Sorel, Baffin), wool socks, hand warmers, thick gloves (with a thin liner glove for camera adjustments), balaclava/hat.
- Personal Anecdote: My first aurora trip, I underestimated the cold. My fingers went numb within minutes, making camera adjustments agonizing. I now swear by chemical hand warmers and a good pair of convertible mitts.
- Lens Heater (Optional, but highly recommended):
- Why: Prevents condensation and frost from forming on your lens in extreme cold. Powered by a small USB power bank.
Before you even set foot in the Arctic, practice with your gear in the dark. Get comfortable changing settings, focusing manually, and setting up your tripod blindfolded. The last thing you want is to fumble with your camera while a spectacular aurora display is unfolding above you.
---
Section 4: Mastering the Light Dance – Camera Settings for Aurora
Now for the technical part – getting your camera settings dialed in. This is where many beginners struggle, but with a few key adjustments, you'll be well on your way to capturing stunning aurora photographs.
- Manual Mode (M): This is non-negotiable. You need full control over every setting.
- Focus: Manual Focus to Infinity.
- How: Autofocus struggles in the dark. Switch your lens to manual focus. In Live View mode, zoom in on a distant star, a bright planet, or even a distant street light (if available) and manually adjust the focus ring until it's sharp. Once focused, do not touch the focus ring again and consider taping it down with gaffer tape to prevent accidental bumps.
- Personal Story: I once forgot to tape my focus ring. After a spectacular 30-minute display, I reviewed my shots only to find everything slightly soft. Heartbreaking! Learn from my mistake.
- Aperture: Widest Possible (e.g., f/2.8, f/1.8, f/1.4).
- Why: You want to gather as much light as possible. A wider aperture (smaller f-number) achieves this.
- ISO: Start Around 1600-3200.
- Why: This setting determines your sensor's sensitivity to light. You'll need a high ISO in the dark, but too high introduces noise.
- Adjustment: For fainter aurora, you might push to ISO 4000-6400. For very bright, active aurora, you might be able to drop it to ISO 800-1600. It's a balance you'll adjust on the fly.
- Shutter Speed: The Sweet Spot (5-30 seconds).
- Why: This determines how long your sensor collects light.
- Fast-moving/Active Aurora: Use shorter exposures, typically 5-15 seconds, to capture the aurora's distinct shapes and movements without blurring.
- Slow-moving/Faint Aurora: Longer exposures, 15-30 seconds, will gather more light and make the aurora appear brighter.
- Star Trails: Be mindful that anything over 20-25 seconds (depending on your focal length) can start to show star trails. Use the "500 Rule" (500 / focal length = max shutter speed for full-frame; 300 / focal length for crop-sensor) to avoid visible star movement if you want pin-point stars.
- White Balance: Experiment (Kelvin 3500-4500K).
- Why: Auto White Balance can be inconsistent in the dark.
- Recommendation: Start with a custom Kelvin setting like 3500K to 4500K for cooler, more natural aurora tones. You can always fine-tune this in post-processing if you shoot RAW.
- RAW vs. JPEG: Always Shoot RAW.
- Why: RAW files contain much more image data than JPEGs, giving you maximum flexibility for editing and recovering details in post-processing. This is crucial for low-light photography.
A Typical Starting Point:
* Mode: Manual (M)
* Focus: Manual, to infinity
* Aperture: f/2.8 (or widest available)
* ISO: 1600-3200
* Shutter Speed: 15-20 seconds
* White Balance: 3800K
* Shoot: RAW
From here, review your first few shots. Is it too bright? Reduce ISO or shutter speed. Too dark? Increase ISO or shutter speed. Is the aurora blurring? Shorten shutter speed. It's an iterative process, and you'll quickly develop an eye for what works.
---
Section 5: Composition & Creativity – Beyond the Standard Shot
Anyone can point a camera at the sky, but a truly memorable aurora photograph tells a story, evokes emotion, and stands out from the crowd. This is where your artistic eye comes into play.
- Foreground Elements are Key:
- Why: The aurora alone, while spectacular, can sometimes lack depth. Adding a foreground element grounds the image and provides scale.
- Ideas: Silhouetted trees, snow-covered cabins, frozen lakes reflecting the lights, majestic mountains, ice formations, a winding road, or even a person (you!).
- Tip: Scout locations during the day to identify interesting foregrounds.
- Reflections for Double the Magic:
- Why: If you're lucky enough to find still, unfrozen water (or even smooth ice), the aurora's reflection can create a breathtaking symmetrical composition.
- Locations: Lakes, calm fjords, or even puddles if the conditions are right.
- Self-Portraits with the Aurora:
- How: Set your camera up on a tripod, compose the shot, and use your remote shutter release. Just before the shutter closes, briefly illuminate yourself with a soft, diffused flashlight (don't shine it directly at the camera!) to add a subtle glow. Practice this to get the timing right.
- Result: This adds a human element, emphasizing the scale and wonder of the phenomenon.
- Time-Lapse: Capturing the Dance:
- Why: The aurora is dynamic. A time-lapse video shows its incredible movement in a way still photos cannot.
- How: Requires an intervalometer (often built into modern cameras) and significant post-processing. Shoot hundreds of consecutive photos with consistent settings, then stitch them into a video.
- Light Painting (Subtlety is Key):
- How: During your long exposure, use a flashlight to briefly "paint" light onto your foreground elements. Be very subtle and quick; too much light will overexpose the scene.
- Result: Adds dimension and interest to dark foregrounds.
- Tell a Story:
- Question: What emotion do you want your photo to convey? Awe? Solitude? The vastness of space?
- Approach: Think beyond just "pretty." Frame your shot to tell a narrative. Is it the lone explorer under the cosmic curtain, or the peaceful cabin nestled beneath a celestial storm?
I remember one night in Yukon, I found an old, abandoned trapper's cabin silhouetted against a field of fresh snow. As the aurora began to pulse, I composed my shot with the cabin as a stark, human element against the wild, dancing lights. It wasn't just a photo of the aurora; it was a story of resilience and wonder in the wilderness.
---
Section 6: Post-Processing – Bringing Out the Magic (Without Overdoing It)
You've captured the RAW files; now it's time to bring them to life. Post-processing is where you can enhance the colors, reduce noise, and refine details, but the key is to enhance, not invent. The goal is to make your photo reflect what you experienced, not create something artificial.
Essential Software:
* Adobe Lightroom Classic/Lightroom: Industry standard for RAW processing.
* Adobe Photoshop: For more advanced techniques like stacking or intricate noise reduction.
Key Adjustments:
- Basic Adjustments (Exposure, Contrast, Highlights, Shadows, Whites, Blacks):
- Start by adjusting exposure to bring out detail. Recover highlights (stars, bright aurora) and lift shadows (foreground). Add a touch of contrast to make the aurora pop.
- White Balance Refinement:
- If you shot in RAW, you can easily adjust the Kelvin temperature. Fine-tune it to achieve the greens and purples you remember, or experiment for different moods. I often push it slightly cooler.
- Noise Reduction:
- Crucial for high ISO shots. Lightroom's Luminance Noise Reduction slider is your friend. Apply it carefully; too much can soften details. Sometimes, a combination of Luminance and Color Noise Reduction is best.
- Clarity & Dehaze:
- A slight increase in Clarity can make the aurora feel sharper and more defined. Dehaze can help cut through any atmospheric haze, making the aurora more vibrant. Use sparingly.
- Color Adjustments (HSL Sliders):
- If your greens or purples aren't quite right, use the HSL (Hue, Saturation, Luminance) sliders to selectively adjust those specific color ranges. You can boost the saturation of the greens or shift their hue slightly.
- Sharpening:
- Apply a small amount of sharpening to bring out detail, especially in the stars and aurora edges.
- Lens Corrections:
- Enable profile corrections to fix any lens distortions or chromatic aberrations.
- Cropping & Straightening:
- Ensure your horizon is level and crop for a stronger composition.
My first attempts at editing were a disaster. I over-saturated the colors, cranked up the clarity too high, and ended up with an image that looked artificial and garish. It took time, patience, and learning to trust my eye to realize that subtlety is power. The best edits are often those you don't even notice, they just make the photo feel 'right'.
---
Conclusion: Chase the Unseen, Capture the Unforgettable
The Northern Lights are more than just a phenomenon; they are an experience, a spiritual encounter with the raw power and beauty of our planet. As the world shrinks and travel becomes more accessible, the challenge for us, the intrepid explorers and visual storytellers, is to seek out those moments of untamed beauty before they are diluted by the masses.
This isn't about hoarding secrets; it's about inspiring a deeper, more respectful engagement with these natural wonders. It’s about encouraging you to invest the time, endure the cold, and push your creative boundaries to capture something truly unique – a photograph that reflects not just the aurora's light, but the profound sense of wonder you felt standing beneath it.
So, are you ready to chase the unseen? Are you prepared to venture off the beaten path, embrace the cold, and immortalize the aurora borealis in a way that truly sets your images apart? The Arctic wilderness awaits, promising not just incredible photographs, but memories that will last a lifetime.
Share your aurora dreams and aspirations in the comments below! What's your ultimate aurora destination? Don't forget to tag #TripsoraLights and #AuroraUnfiltered when you post your breathtaking shots. Let's inspire each other to explore, discover, and capture the magic before it becomes just another postcard.
---