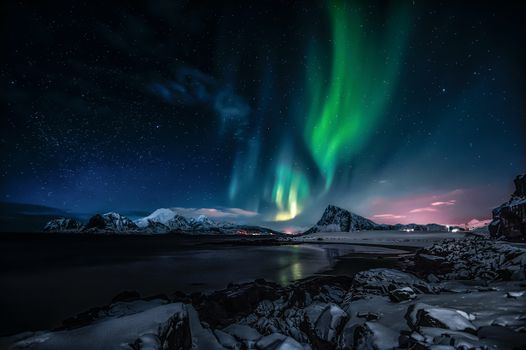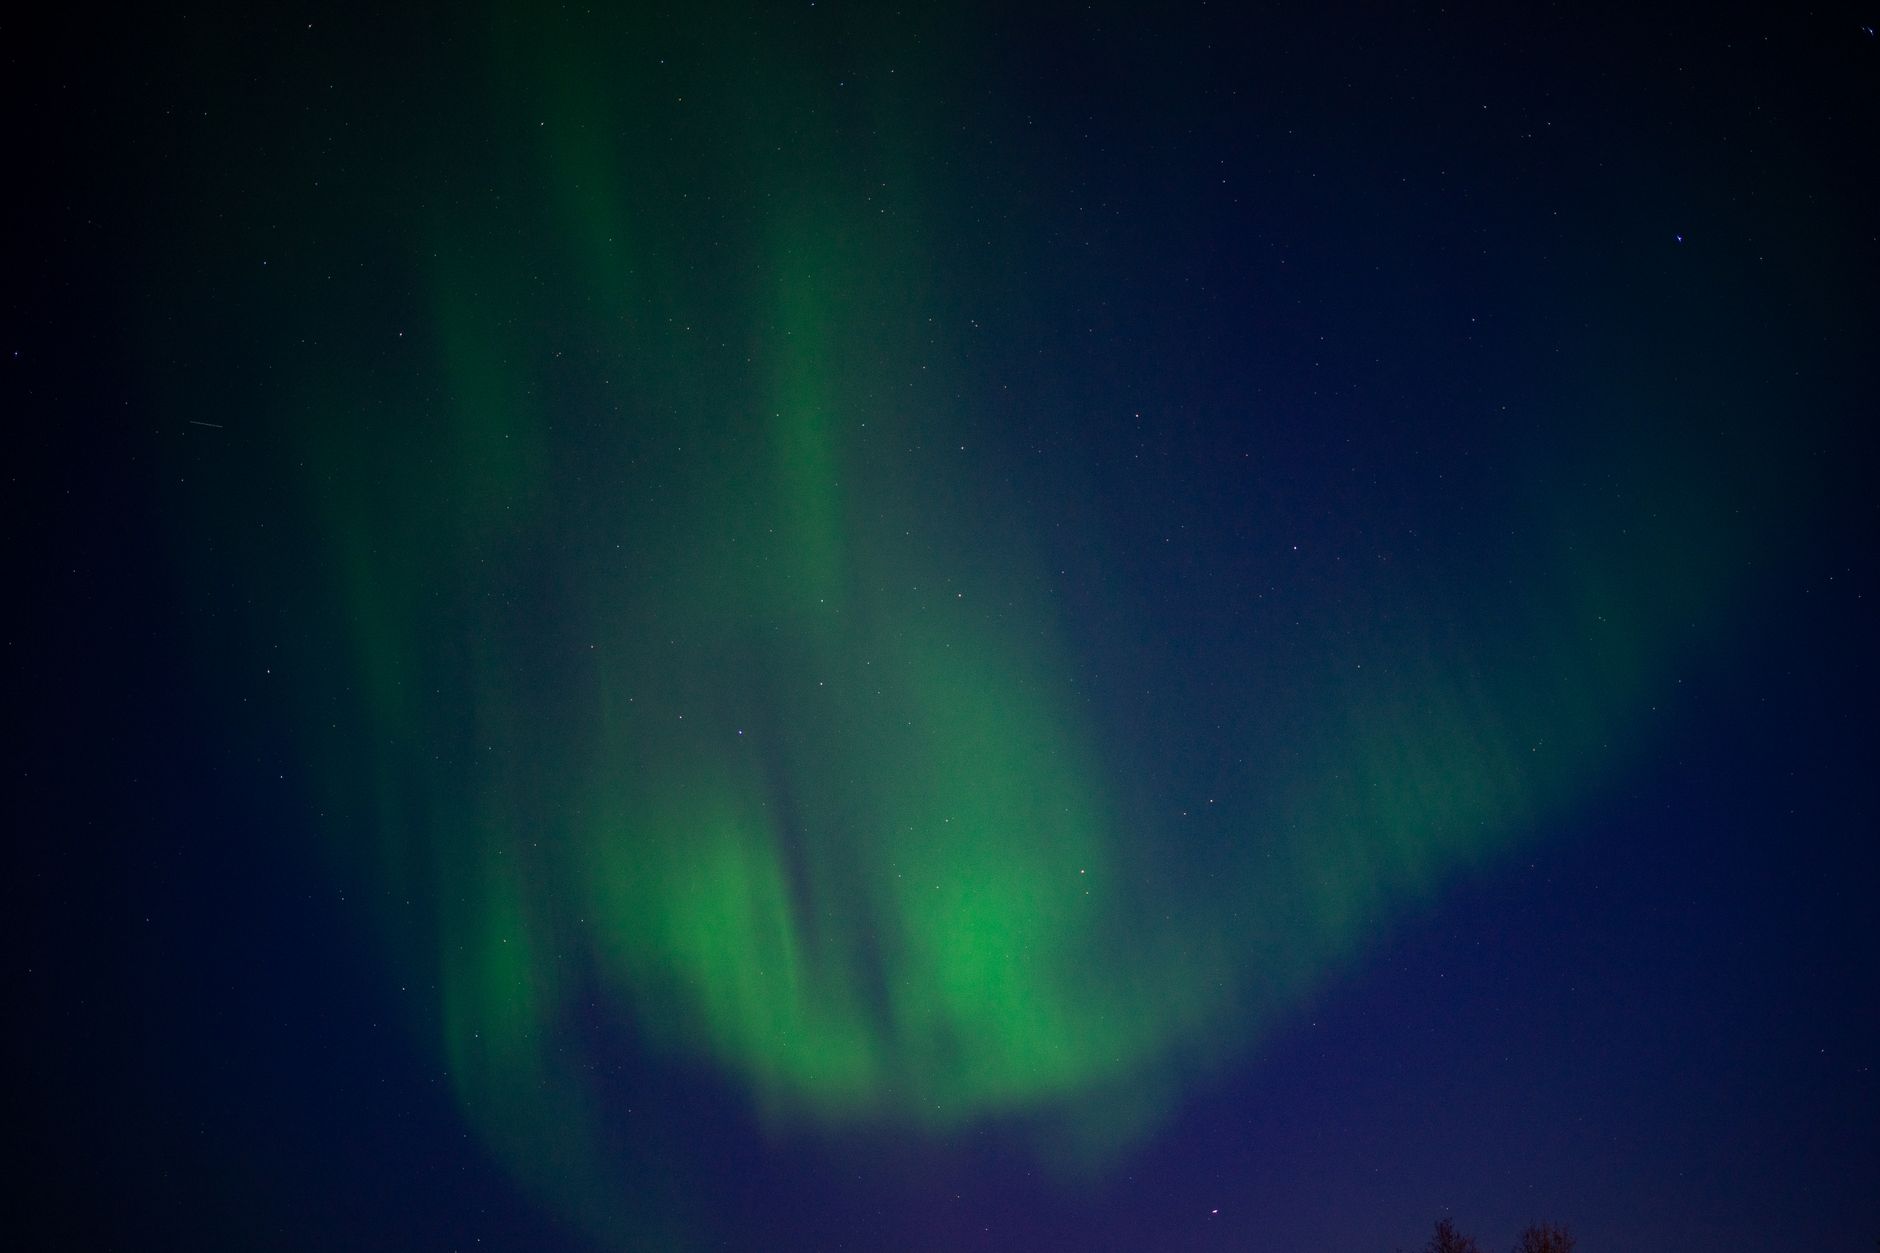
The Arctic wind bit at my exposed skin, my fingers already numb despite the thick gloves. My camera, an expensive piece of gear I’d saved months for, sat stubbornly on its tripod, refusing to cooperate. For the fifth night in a row, my Northern Lights photos were… underwhelming. Blurry green smudges, overexposed streaks, or worse, nothing at all. I’d read all the blogs, watched the YouTube tutorials, and memorized the "f/2.8, ISO 3200, 20s" mantra. Yet, here I was, shivering under a sky that was dancing gloriously, while my camera just wasn't getting it.
Frustration simmered, threatening to boil over. That's when I saw him – an elderly Sami man, his face weathered by years of Arctic sun and snow, calmly adjusting his camera a few meters away. He wasn't fiddling with settings frantically like me. He was watching the sky, his movements deliberate, almost meditative. After another failed attempt, I sighed loudly, and he looked over, a knowing smile crinkling the corners of his eyes.
"Too long," he said, his voice raspy but kind, gesturing at my camera. "She dances fast tonight. You must dance with her."
That simple exchange, over a cup of surprisingly potent cloudberry tea he later shared, changed everything. He didn't give me a magic setting; he gave me a philosophy. He taught me to read the aurora, to feel the Arctic, and to photograph it not just with my camera, but with my soul. He shared insights that no tourist brochure or generic blog post ever would. And now, I’m sharing them with you.
Forget the crowds, the generic settings, and the disappointment. This isn't just a guide to Northern Lights photography; it's an invitation to unlock the secrets locals have guarded for generations. It’s about capturing the aurora in a way that truly reflects its otherworldly beauty, making your friends back home wonder if you somehow bottled pure magic.
---
1. Beyond the Forecast: Reading the Sky Like a Local
It's Not Just About KP: Decoding the Aurora's Whispers
When you're chasing the Northern Lights, the first thing everyone tells you to check is the KP index. And yes, a higher KP (geomagnetic activity index) generally means a stronger aurora. But relying solely on it is like judging a book by its cover. Locals know that the KP index is just one piece of a much larger, more intricate puzzle.
The Real Game-Changer: Cloud Cover and Microclimates.
This is the number one factor locals prioritize. A KP of 5 is useless if the sky is socked in. What tourists often miss is that weather can be incredibly localized. A small fjord, a sheltered valley, or a specific inland area might have perfectly clear skies even when the main coastal towns are blanketed in clouds.
- My Anecdote: I once spent an entire evening in Tromsø, Norway, watching frustratingly thick clouds. The KP was high, the forecast for the city grim. A local friend, a seasoned aurora hunter, called me. "Drive to Ersfjordbotn," he said. "It's often clearer there, the mountains push the clouds differently." Skeptical, but desperate, I drove. Forty minutes later, I was standing under a perfectly clear sky, watching an incredible display, while my hotel in Tromsø was still under a grey blanket. It was a revelation.
How to get this local insight?
* Hyper-Local Weather Apps: Ditch your generic weather app. In Iceland, people swear by Veður; in Norway, Yr.no is king. These offer hyper-local forecasts, often down to specific villages or fjords, and are far more accurate for pinpointing clear patches.
* Look Inland: Often, coastal areas get more cloud cover. Driving 30-60 minutes inland can sometimes get you above or beyond the coastal clouds.
* Moon Phase and Light Pollution: While obvious, locals actively seek out new moon phases and truly dark sky preserves. Even a sliver of moon can wash out fainter aurora, and city glow is a killer. Use apps like PhotoPills or Stellarium to plan for moonless nights and scout dark locations during the day.
---
2. The Gear You Really Need (And What You Can Skip)
Ditch the Fluff: Essential Kit for Arctic Aurora Hunting
You don't need every gadget under the sun, but what you do need, you need to be serious about. Locals value functionality and resilience in the face of the Arctic's harsh realities.
- The Camera Body: A full-frame DSLR or mirrorless camera is ideal due to its superior low-light performance and dynamic range (e.g., Sony A7 III/IV, Nikon Z6/7, Canon R6/5). APS-C cameras (like Sony a6000 series, Fuji X-T series, Nikon D500) can still deliver fantastic results, but you'll likely push your ISO a bit higher. Don't worry if you don't have the latest and greatest; understanding your gear is more important than having the most expensive.
- The Lens: Your Best Friend. This is where you don't compromise. You need a wide-angle lens with a fast aperture (f/2.8 or wider).
- Why wide-angle? To capture the immense sweep of the sky and include interesting foreground elements. Think 14mm-24mm for full-frame, or 10mm-16mm for APS-C.
- Why fast aperture? This is crucial. An f/2.8 lens lets in twice as much light as an f/4 lens, allowing for shorter shutter speeds, which means sharper, more detailed aurora and less star trailing.
- Examples: Sigma 14-24mm f/2.8, Sony 16-35mm f/2.8 GM, Nikon 14-24mm f/2.8, Laowa 15mm f/2, Samyang/Rokinon 14mm f/2.8 (manual focus, but excellent value).
- The Tripod: Rock Solid. A sturdy tripod is non-negotiable. The Arctic winds can be brutal, and even slight camera shake will ruin your long exposures. Carbon fiber is lighter for travel, but aluminum is fine too. Look for brands like Manfrotto, Gitzo, or Peak Design. Make sure it has a hook to hang your camera bag for extra stability in windy conditions.
- Remote Shutter Release: Essential to trigger your camera without touching it, eliminating camera shake. A simple wired one is reliable; wireless is convenient but can be affected by cold.
- Batteries, Batteries, Batteries! Cold temperatures drain batteries at an alarming rate. Always carry at least 2-3 spares, and keep them warm (e.g., in an inside pocket next to your body) until you need them.
- Headlamp with Red Light Mode: This is a local secret and a sign of a considerate photographer. Red light preserves your night vision and, crucially, doesn't blind other photographers (or yourself) while you're adjusting settings.
- Arctic-Ready Clothing: Layers are key. A good base layer (merino wool), a warm mid-layer (fleece or down), and a windproof, waterproof outer shell. Don't forget insulated boots (Sorel, Baffin), heated gloves, and toe warmers. A thermos of hot tea or coffee is a lifesaver.
- What to Skip: Don't bother with UV filters (they can cause ghosting/reflections with bright lights) or heavy, slow zoom lenses. Keep your kit light and focused on low-light performance.
---
3. Settings That Sing: Mastering the Aurora Dance
From Blurry Blobs to Breathtaking Bands: Your Camera's Secret Sauce
This is where the Sami man's advice truly clicked for me. It's not about one set of settings; it's about adapting to the aurora's mood.
- Manual Mode (M): Absolutely non-negotiable. You need full control.
- Focus: Manual to Infinity. Your camera's autofocus will struggle in the dark.
- Method 1 (Preferred): During the day, focus on a distant object (like a mountain or a far-off tree). Once focused, switch your lens to manual focus (MF).
- Method 2 (At night): Use Live View (if your camera has it), crank up the ISO, and zoom in on the brightest star you can find. Manually adjust focus until the star is a tiny pinprick of light, then switch to MF. Some lenses have an infinity mark, but test it first – it's not always precise.
- Aperture: Widest Possible. Set your lens to its widest aperture (e.g., f/2.8, f/2.0, f/1.4). This lets in the maximum amount of light, allowing for shorter shutter speeds and lower ISOs.
- ISO: The Light Gatherer. Start around ISO 1600-3200. This is your primary adjustment for aurora brightness.
- Bright, active aurora: You can often drop your ISO to 800-1600.
- Faint, slow aurora: You might need to push it to 3200-6400.
- Local Insight: Don't be afraid of higher ISOs with modern cameras. A slightly noisy but sharp aurora is far better than a blurry, low-ISO mess. Noise can be reduced in post-processing.
- Shutter Speed: The Aurora's Rhythm. This is your most dynamic setting, and it’s where most tourists go wrong.
- The "Tourist Trap" Setting: Many guides suggest 15-25 seconds. This can work for faint, slow-moving aurora, but for brighter, faster displays, it will result in blurry, washed-out green streaks.
- The Local Secret: Match your shutter speed to the aurora's activity.
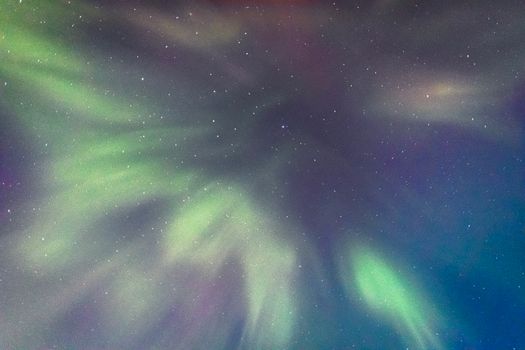
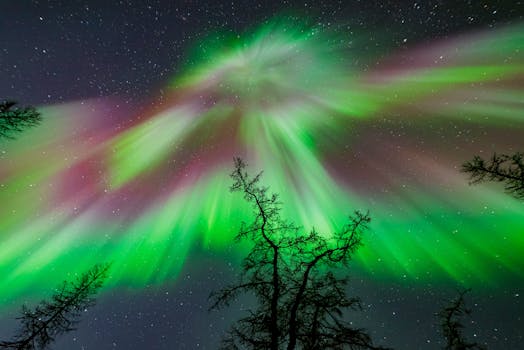
- Fast, dancing, defined aurora: Use 5-10 seconds. This freezes the intricate patterns and "rays" of the aurora, giving you those stunning, detailed shots. This is what the Sami man meant by "she dances fast."
- Medium activity, flowing aurora: 10-15 seconds.
- Faint, slow-moving "glow": 15-20 seconds. (Only if absolutely necessary, and be prepared for less definition).
- My Anecdote: The first time I tried a 7-second exposure on a rapidly swirling aurora, I was stunned. Instead of the hazy green cloud I usually got, there were defined rays, streaks of purple, and incredible detail. It was like seeing the aurora for the first time through my lens.
- White Balance: Color Control. Auto WB can be inconsistent in the dark. Try setting a specific Kelvin temperature, usually around 3200K-4000K, or use the Tungsten preset. This often gives a cooler, truer-to-eye rendition of the aurora's greens and purples.
- RAW vs. JPEG: Always shoot in RAW. This preserves all the image data, giving you maximum flexibility for post-processing adjustments (exposure, white balance, noise reduction) without degrading image quality.
---
4. Composition Beyond the Horizon: Adding Local Flavor
More Than Just Lights: Crafting a Story with Your Shot
A sky full of aurora is breathtaking, but a truly memorable aurora photograph tells a story, placing the celestial dance within the context of the stunning Arctic landscape. This is where locals excel – they know their land intimately and how to frame the aurora within it.
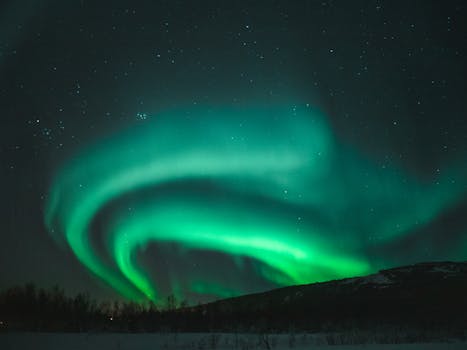
- Foreground Interest: The Anchor. This is paramount. A lone tree, a snow-covered cabin, a frozen lake, a mountain peak, or even interesting rock formations give your photo depth, scale, and a sense of place. Without a foreground, your aurora shot can feel flat and dimensionless.
- The Human Element (Subtly): A silhouette of yourself or a friend, perhaps looking up at the sky, adds an incredible sense of scale and wonder. Just ensure they stay perfectly still during the exposure! Local Tip: Use a low-power red-light headlamp for a split second to 'paint' your subject with light if it's too dark, but be very quick and subtle.
- Reflections: Double the Magic. Seek out calm, still water – a frozen lake, a tranquil fjord, or even a small puddle of melted ice. The aurora reflecting on water creates a mirror-like effect, doubling the visual impact and adding incredible symmetry.
- Specific Locations with Amazing Reflections:
- Iceland: Jökulsárlón Glacier Lagoon (icebergs and reflections), Vestrahorn (iconic mountains and still water), Kirkjufell (the famous 'church mountain' with its reflection). Be warned, these can be crowded.
- Norway (Lofoten/Tromsø): The picturesque fishing villages of Hamnøy and Reine in Lofoten offer stunning rorbuer (fishing cabins) reflecting in the water. In the Tromsø region, Ersfjordbotn or Sommarøy often have calm waters.
- Finland (Lapland): The Ounasjoki River near Rovaniemi or Lake Inari offer vast, dark expanses perfect for reflections.
- Leading Lines: Use natural elements like winding roads, riverbanks, or fences to draw the viewer's eye towards the aurora.
- Rule of Thirds: Mentally divide your frame into a 3x3 grid. Place your main subjects (aurora band, foreground interest) along these lines or at their intersections for a more dynamic composition.
- Scout During the Day: This is a crucial "unwritten rule" for locals. Drive around in daylight, identify interesting foregrounds, potential reflections, and clear sightlines. Note down GPS coordinates or drop pins on your phone. It's almost impossible to find good compositions in pitch black.
---
5. The "Unwritten Rules" of Aurora Chasing (Local Etiquette)
Respecting the Dark: How to Be a Responsible Aurora Hunter
Chasing the aurora is a shared experience. Locals, who live under these skies, have an unspoken code of conduct that enhances the experience for everyone. Following these rules isn't just polite; it's essential for getting the best shots and showing respect for the environment and fellow aurora enthusiasts.
- Light Discipline is Paramount: This is the biggest pet peeve for serious photographers and locals.
- RED LIGHT ONLY: Use a headlamp with a red light setting. It preserves your night vision and, crucially, doesn't ruin other people's long exposures or blind them.
- NO BRIGHT PHONE SCREENS: Your phone screen is a giant light source. Keep it dim, or better yet, keep it in your pocket unless absolutely necessary.
- NO CAR HEADLIGHTS: Do not turn on your car's headlights or interior lights if there are other photographers around. Park facing away from the scene if possible, or turn off your engine and lights completely. If you must move your car, give a warning.
- My Anecdote: I once witnessed a local photographer in Iceland politely but firmly educate a tourist group who were shining phone flashlights around. He explained calmly that it ruins everyone's photos and night vision. The group quickly understood and switched to red lights. It was a powerful lesson in respecting the shared experience.
- Keep Noise Levels Down: The Arctic night is incredibly silent. Enjoy it. Keep conversations hushed. Loud voices or music disrupt the tranquility and are disrespectful to others.
- Leave No Trace: Pack out everything you pack in. Coffee cups, snack wrappers, tissues – take it all with you. The pristine Arctic environment deserves our utmost respect.
- Respect Private Property: Don't trespass onto private land for a photo. There are countless public spots with incredible views.
- Safety First:
- Dress Warmly: Reiterate the importance of layers. Hypothermia is a real risk.
- Inform Someone: Let your hotel, guesthouse, or a friend know where you're going and when you expect to return, especially if you're venturing far out.
- Be Aware of Driving Conditions: Roads can be icy, snowy, or unpaved. Drive slowly and carefully. Check road conditions before you leave (e.g., Vegagerðin in Iceland, Statens Vegvesen in Norway).
- Engage Politely: If you see a local photographer, a polite greeting and genuine interest in their passion can go a long way. They often have invaluable tips about local conditions or lesser-known spots. Don't demand their "secret spot," but be open to learning. Often, the best spots are simply those you discover by driving a bit further from the crowds, looking for clear skies and an interesting foreground.
---
6. Post-Processing: Bringing the Magic to Life
From RAW to WOW: Polishing Your Aurora Masterpiece
Capturing the aurora in RAW is just the first step. Post-processing is where you truly bring out the magic, enhancing what your camera saw and making it closer to what your eye experienced. Locals know that less is often more – the goal is to enhance, not to invent.
- Software Choices: Adobe Lightroom Classic, Photoshop, Affinity Photo, or Capture One are all excellent choices. Lightroom is a great starting point for its powerful RAW editing capabilities.
- Basic Adjustments (The Foundation):
- Exposure: Adjust slightly if your shot is too dark or too bright.
- Contrast: Add a touch to make the aurora pop against the sky.
- Highlights & Shadows: Recover detail in bright aurora peaks or dark foreground shadows.
- Whites & Blacks: Fine-tune the brightest and darkest points for punchier images.
- White Balance Refinement: Even if you set it in-camera, fine-tune the Kelvin temperature or tint slider to get the most natural-looking greens and purples. Avoid making the aurora look radioactive.
- Dehaze: A subtle application of the Dehaze slider can sometimes help bring out the definition and vibrancy of the aurora, especially if there was a bit of atmospheric haze.
- Noise Reduction: The Delicate Balance. High ISO shots will inevitably have noise.
- Apply noise reduction carefully in your software. Start with Luminance noise reduction (e.g., in Lightroom).
- Local Tip: Don't overdo it! Too much noise reduction makes your image look plasticky and smears away details. A little grain is often preferable to a smooth, artificial look.
- Detail-preserving noise reduction algorithms are key here.
- Sharpening: Apply a small amount of sharpening, primarily to the aurora and foreground elements, to enhance detail. Again, less is more.
- Color Grading (Subtly): Enhance the natural colors of the aurora. Boost the saturation and vibrance of greens and purples, but critically, do not over-saturate. The most authentic aurora shots are those where the colors feel real, not artificial.
- Lens Corrections: Enable profile corrections for your lens to fix any vignetting or distortion.
- Cropping and Straightening: Straighten your horizon and crop for a stronger composition.
- Advanced (Optional): Stacking: For those truly aiming for perfection, taking multiple identical shots and stacking them in specialized software (like Sequator or Photoshop) can significantly reduce noise, especially in the foreground, resulting in an incredibly clean image. This is a technique many advanced astrophotographers use.
---
Ready to chase the aurora like never before?
The Northern Lights are more than just a light show; they're a primal force, a celestial dance that connects you to the vastness of the universe and the ancient wisdom of the Arctic. By adopting these "local secrets" – a blend of preparedness, respect, and a deep understanding of the environment – you're not just taking a photo; you're capturing an experience, a memory, and a piece of the magic that locals have cherished for centuries.
Forget chasing the perfect setting; chase the perfect moment. Listen to the sky, feel the cold, and let the aurora guide your lens. You'll come away not just with stunning photos, but with a profound connection to one of Earth's most spectacular wonders.
Share your favorite aurora chasing memory or photography tip in the comments below! Don't forget to tag #TripsoraAuroraSecrets on Instagram with your breathtaking shots – we can't wait to see them!
---