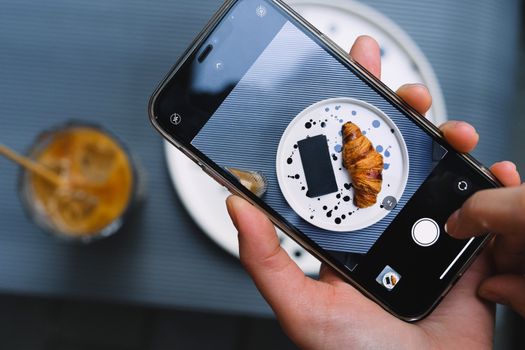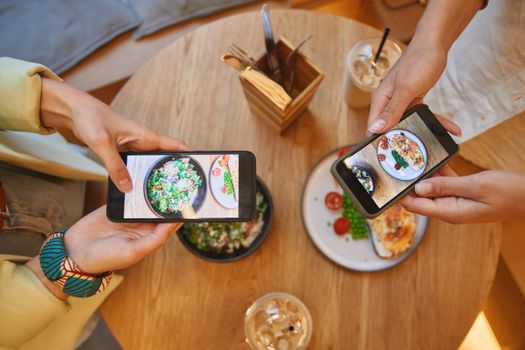
Remember that moment? You're sitting in a bustling trattoria in Rome, a plate of Cacio e Pepe steaming in front of you, perfectly al dente, glistening with cheese and pepper. You pull out your phone, snap a quick pic, and… it just doesn't capture the magic. It looks flat, yellow, and frankly, a bit unappetizing. Meanwhile, at the next table, a local subtly angles their phone, clicks once, and you know they just captured pure culinary gold.
That used to be me, every single trip. My food photos were less "mouth-watering masterpiece" and more "proof I ate something." I’d scroll through Instagram, admiring the stunning shots from local food bloggers and thinking, "How do they do that?" It felt like there was some secret handshake, a hidden code that only the locals knew. And guess what? There kind of is.
But after years of trial, error, countless mediocre snaps, and a lot of subtle observation (okay, sometimes outright eavesdropping) in cafes, markets, and street food stalls from Saigon to Seville, I’ve cracked the code. I’ve learned the unspoken rules, the subtle techniques, and the genuine appreciation for food that transforms a simple photo into a story. And today, I’m spilling the beans – the "locals don't want tourists to know" kind of beans. Get ready to turn your travel food photos from bland to brilliant, making every meal a shareable, drool-worthy moment.
Let’s dig in!
The Light Whisperer: Mastering Natural Illumination Like a Pro
This is, hands down, the single most important secret. Locals instinctively gravitate towards the best light. They don't need fancy ring lights or studio setups; they understand natural light is the ultimate food stylist.
I learned this lesson the hard way in a dimly lit tapas bar in Barcelona. My patatas bravas looked like sad, grey lumps. Then I noticed a young woman at a nearby table, carefully positioning her plate of jamón ibérico by a tiny, unassuming window. The ham, previously just a dark smudge, now glowed with an almost ethereal sheen, each marbled fat line perfectly defined. It was an epiphany.
Your Actionable Tips:
- Seek Out Window Light: This is your holy grail. Always, always try to sit near a window. Position your dish so the light comes from the side (sidelight) or slightly behind (backlight). This creates dimension, highlights textures, and makes food look fresh and inviting. Direct front-facing light can flatten a dish.
- Avoid Direct Sunlight: Harsh midday sun creates harsh shadows and overexposed highlights. If you're outdoors, look for shaded areas or shoot early morning/late afternoon for softer, golden hour light.
- Use DIY Diffusers & Reflectors: Locals are resourceful. If the light is too harsh from a window, a white napkin, a menu, or even a piece of paper held opposite the window can act as a diffuser, softening shadows. A white wall or a light-colored plate can reflect light back onto your dish, brightening darker areas. I once saw a street vendor in Mexico City use a piece of cardboard wrapped in foil to bounce light onto his tacos – genius!
- Embrace Backlight for Drama: When the light source is behind the food, it creates a beautiful halo effect, especially good for drinks, steam, or translucent dishes. Just be careful not to underexpose the front of your food – you might need to tap your phone screen to expose for the dish itself.
Personal Anecdote:
In a tiny, family-run bakery in Lisbon, I watched an elderly gentleman, clearly a regular, gently shift his pastel de nata closer to the morning sun streaming through the doorway. He didn't even take a photo, but he was intuitively optimizing for visual appeal. That's when I realized this isn't just about photography; it's about appreciating the food in its best light.
The Art of the Angle: It's More Than Just Top-Down
While the overhead "flat lay" is an Instagram staple, locals know that different dishes demand different perspectives to truly shine. It's about showcasing the unique characteristics of each culinary creation.
I used to instinctively shoot everything from directly above. My towering gelato in Rome looked like a colourful puddle. My stacked burger in NYC looked like a flat disc. It wasn't until I saw a local effortlessly capture the sheer height of a dessert at a patisserie in Paris, from a slightly lower angle, that I understood the power of perspective.
Your Actionable Tips:
- The Overhead (Flat Lay) - The Storyteller: Perfect for spreads, vibrant tapas, intricate noodle bowls with toppings, or a beautifully arranged breakfast. It shows the whole picture, the variety, and the overall aesthetic. Think of it as mapping out your meal.
- The 45-Degree Angle - The Inviter: This is your most versatile angle, mimicking how you'd naturally see the food from your seat. It's ideal for dishes with some height and depth – pasta, curries, stews, or anything where you want to show off textures and layers. It creates a sense of invitation, making the viewer feel like they're about to dig in.
- The Eye-Level Angle - The Emphasizer: Best for showing off height and structure. Think towering burgers, multi-layered cakes, impressive cocktails, or a perfectly poured latte. Get down low, almost level with the plate, to truly emphasize its stature.
- Close-Up/Macro - The Detailer: Don't be afraid to get in close! Capture the steam rising from a ramen bowl, the glistening sauce on a steak, the flaky crust of a pastry, or the intricate details of a garnish. This adds a sensory element, making the viewer almost taste the food.
- Dynamic Angles: Experiment with slight tilts or off-center compositions to create interest. Sometimes, a slightly askew shot can feel more natural and authentic than a perfectly centered one.
Personal Anecdote:
Dining at a bustling izakaya in Tokyo, I watched a young local woman take three distinct shots of her yakitori skewer: one overhead to show the whole plate, one 45-degree to capture the glaze, and then a super close-up of a single perfectly charred piece. She understood the story each angle told.
The Storyteller's Frame: Context and Composition Beyond the Plate
Food isn't just food; it's part of an experience, a culture, a memory. Locals don't just photograph the dish; they capture the vibe. They understand that the background elements, however subtle, add depth and authenticity to the story.
I used to meticulously crop out everything but the food. My photos were sterile, disconnected. Then, exploring a street food market in Bangkok, I saw a local photographer snapping a picture of Pad Thai, but he intentionally included the blurred bustling market in the background, a hint of the vendor's stall, and even the chopsticks about to dive in. It wasn't just Pad Thai; it was Bangkok Pad Thai.
Your Actionable Tips:
- Embrace the Context: Let your surroundings peek into the frame. A patterned tablecloth, a unique restaurant interior, a blurred street scene, or even the hands of a fellow diner can add character and tell a richer story. But keep it subtle – the food should still be the star.
- Rule of Thirds (and Breaking It): The classic photography rule where you place your main subject off-center, at one of the intersecting points of a grid. It creates a more dynamic and engaging composition. But don't be afraid to break it for impact, especially with minimalist compositions.
- Negative Space is Your Friend: Don't feel the need to fill every inch of the frame. Allowing some empty space around your dish can draw attention to the food itself, making it stand out and feel more premium.
- Depth of Field (Bokeh): On most modern smartphones, you can achieve a blurred background effect (bokeh) using "Portrait Mode" or similar settings. This beautifully isolates your food from the background, making it pop.
- Include a Human Element: A hand reaching for a fork, chopsticks hovering over noodles, a pouring motion – these add a sense of scale, interaction, and immediacy. It makes the photo feel alive and relatable.
Personal Anecdote:
In a tiny café in Hoi An, Vietnam, I watched a local couple photograph their Banh Mi. Instead of just the sandwich, they included the intricate ceramic tile of the table, the condensation on their iced coffee, and a glimpse of the lantern-lined street outside. It transformed a simple meal into a postcard-worthy memory.
Color & Texture Magic: Post-Processing Secrets (Mobile-Focused)
Let's be real: even the pros (and the locals!) do a quick edit. It’s not about slapping on a heavy filter; it’s about enhancing what’s already there, correcting imperfections, and making colors sing. Think of it as seasoning your photo.
My early food photos, especially indoors, often had a sickly yellow cast or looked dull. I thought editing was cheating. But then a friend, a local food blogger in Seoul, showed me how she uses Lightroom Mobile to quickly adjust white balance, contrast, and sharpness. Her food photos weren't just bright; they were vibrant, realistic, and utterly irresistible.
Your Actionable Tips (using apps like Lightroom Mobile, Snapseed, or VSCO):
- Correct Exposure: This is fundamental. Brighten underexposed photos, but be careful not to blow out highlights (overexpose bright areas).
- Adjust White Balance: This is crucial for accurate colors. If your photo looks too yellow (common indoors) or too blue, adjust the "Temperature" and "Tint" sliders until the colors look natural and appealing. This makes whites truly white and food colors true-to-life.
- Boost Contrast & Clarity: A slight increase in contrast adds depth and makes colors pop. "Clarity" can enhance textures without over-sharpening.
- Enhance Vibrance & Saturation (Carefully!): "Vibrance" selectively boosts muted colors, while "Saturation" boosts all colors. Use vibrance first for a more natural pop; only slightly increase saturation if needed. Over-saturating makes food look artificial.
- Sharpening: A touch of sharpening can make details crisp, but too much will make your photo look grainy or artificial.
- Crop & Straighten: Always ensure your horizons are straight and crop out distracting elements to focus attention on the food.
Personal Anecdote:
I was in a rustic taverna in Santorini, and the Fava dip looked a bit flat in the dim light. My local friend, seeing my struggle, quickly pulled up her phone, adjusted the white balance and a touch of clarity, and suddenly, the Fava looked creamy, golden, and utterly delicious. It took her literally 10 seconds.
The "Ready to Eat" Factor: Timing and Authenticity
This is perhaps the most subtle, yet powerful, "local secret." Food looks its best when it's just served. That steam, that perfect plating, that freshness – it all fades quickly. Locals understand the fleeting nature of a perfectly presented dish.
I used to wait for everyone to get their food, chat a bit, and then take photos. By then, the ice in my drink was melted, the steam from my soup was gone, and the crispy edges of my fried chicken were softening. It was in a hawker center in Singapore, watching a local snap a photo of his Hainanese chicken rice literally as the vendor placed it down, that I realized the urgency.
Your Actionable Tips:
- Shoot Immediately: As soon as the dish arrives, take your shots. Capture the steam, the pristine plating, the untouched beauty. You have a small window of opportunity.
- Embrace the "Pre-Dig" Shot: Sometimes, a slightly disturbed dish – a fork just lifting a piece of pasta, a spoon dipped into a soup, a single bite taken – can add authenticity and make the photo more inviting. It tells a story of enjoyment.
- Be Quick & Discreet: While you want good photos, don't let it ruin the dining experience for yourself or others. Be quick, minimize your setup time, and don't use flash in a restaurant unless absolutely necessary (and even then, consider the impact on other diners).
- Respect Local Etiquette: In some cultures, photographing food might be less common or even considered rude. Always be observant. If in doubt, a quick, polite "May I?" gesture to your server is usually appreciated.
Personal Anecdote:
In a bustling street food market in Kuala Lumpur, I was trying to photograph a sizzling plate of Char Kway Teow. The heat, the steam, the aroma – it was all part of the experience. I watched a local couple quickly snap their pics, then immediately dig in, their faces lighting up with satisfaction. They understood that the photo was a snapshot of a moment, not an obstacle to enjoyment.
Beyond the Plate: Capturing the Culinary Journey
Finally, the true local secret isn't just about the dish itself, but the entire culinary narrative. Food is intertwined with its origin, its preparation, and its environment. Locals capture the soul of their food scene.
I used to focus solely on the final product. But my trip to a spice market in Marrakech changed everything. The vibrant piles of turmeric, cumin, and paprika were just as photogenic as the tagine I’d eat later. The hands grinding the spices, the intricate patterns of the market stalls – it all contributed to the story of Moroccan cuisine.
Your Actionable Tips:
- Market Vibrancy: Photograph the raw ingredients, the colorful produce, the bustling energy of local markets. These shots add context and show the freshness of the food.
- The Craft of Cooking: If appropriate and respectful, capture moments of preparation – hands kneading dough, a chef expertly slicing ingredients, flames licking a wok. This highlights the effort and artistry behind the dish.
- Chef & Vendor Portraits: A friendly portrait of the person who prepared your meal adds a human touch and celebrates the culinary talent. Always ask permission first!
- Restaurant Ambiance: Don't forget to capture the atmosphere – the unique decor, the lighting, the general buzz of the place. This helps transport your audience to the location.
- The Journey of the Meal: From ordering to waiting, to the first bite – these candid moments can be incredibly powerful.
Personal Anecdote:
I was in Sicily, and instead of just photographing the cannoli, I spent time at the pastry shop, watching the baker fill them by hand, seeing the fresh ricotta being prepared, and even talking to the owner about his family's recipe. The photos of the process, the ingredients, and the smiling baker were far more impactful than just a picture of the finished dessert.
Your Culinary Photo Adventure Starts Now!
The "secrets" that locals hold aren't really secrets at all; they're simply a deeper understanding and appreciation for food, light, and storytelling. It's about being observant, resourceful, and respectful of the dining experience. You don't need expensive gear; your smartphone is a powerful tool when wielded with intention.
So next time you're faced with a delectable dish on your travels, remember these tips. Seek out the light, find the perfect angle, tell a story with your frame, give it a quick polish, and capture it fresh. You'll not only elevate your travel photos but also deepen your connection to the local culture through its cuisine.
Now go forth, make your followers drool, and make every meal an Instagram-worthy masterpiece!
Share your newfound pro food photos with us on Instagram using #TripsoraFoodie and tag us @TripsoraOfficial! Which local secret will you try first? We can't wait to see your delicious creations!