Beyond the Postcard: Capturing the Soul of a Destination with "Unconventional" Camera Settings
The year was 2017. I was trekking through the vibrant chaos of the Grand Bazaar in Istanbul, camera in hand, ready to capture the magic. My feed was usually bursting with vibrant, eye-catching images, but something felt…off. Every shot I took, though technically 'good,' felt like a carbon copy of a thousand others I’d seen online. The intricate patterns of a Turkish rug stall, the steam rising from a street vendor’s chai, the genuine smile of a craftsman – they all looked flat, generic, like I was just ticking off a checklist of "things to photograph in Istanbul."
I returned home feeling deflated. My photos, while pretty, lacked soul. They didn't tell my story, or the story of the place as I experienced it. That’s when I realized the dirty little secret of truly captivating travel photography: it’s not just about being in an amazing place with a fancy camera. It’s about understanding your camera so intimately that you can bend its will to capture the unique essence of a moment, not just its surface. It's about seeing the shot before it becomes mainstream, and knowing exactly how to freeze it in time, distinctively.
Fast forward to today, and my approach is radically different. I still love a good iconic shot, but my passion lies in finding the nuanced, the unexpected, the emotionally resonant. And it all starts with mastering a few "unconventional" camera settings that empower you to break free from the predictable. Forget auto mode, forget simply trying to get a "well-exposed" image. We're diving deep into the creative potential of your camera, transforming your travel photos from mere souvenirs into compelling visual narratives.
Ready to unlock the secrets to truly unique travel photography? Let’s dive in.
---
1. Ditching the Safety Net: Embracing Manual Mode (Your Creative Superpower)
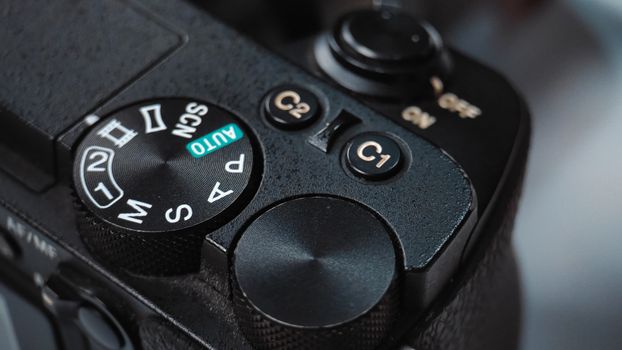
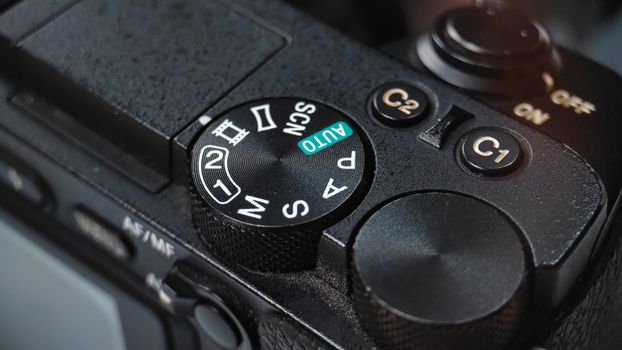
Before we talk specific settings, let's talk philosophy. If you’re still relying on Auto or Program mode for your travel shots, you’re essentially letting your camera make all the creative decisions for you. It’s like painting by numbers when you could be creating a masterpiece. Your camera is smart, but it doesn't understand your vision, the mood you're trying to convey, or the story you want to tell.
The "Mainstream" Trap:
Auto mode aims for a technically correct, balanced exposure. This often results in photos that are perfectly fine, but perfectly forgettable. It homogenizes your images, making a bustling Moroccan souk look as flat as a quiet European street.
The "Unconventional" Shift:
Manual mode (M) or at least Aperture Priority (Av/A) or Shutter Priority (Tv/S) gives you the reins. It allows you to intentionally manipulate light, depth, and motion to craft an image that's distinctly yours. Don't be intimidated! Think of the Exposure Triangle (Aperture, Shutter Speed, ISO) as three levers you can pull to sculpt your image.
My Personal Anecdote:
I remember a trip to Hội An, Vietnam, at dawn. The light was ethereal, soft blues giving way to gentle oranges. I was still dabbling with Aperture Priority. My camera, trying to expose for the overall scene, kept making the stunning lanterns glow with an artificial brightness. Switching to full Manual, I intentionally underexposed slightly, preserving the mystical quality of the lanterns and the deep blues of the fading night. The result? A moody, atmospheric shot that felt like a dream, rather than a brightly lit tourist attraction. That was my 'aha!' moment – realizing I could choose the light, not just accept it.
Actionable Tip:
Start by experimenting with Aperture Priority (Av/A). This allows you to control the depth of field (how much is in focus) while the camera handles the shutter speed. Once you're comfortable, move to Shutter Priority (Tv/S) to control motion, and finally, full Manual. Practice at home, then take it on your next adventure!
---
2. The Art of Selective Focus: Mastering Aperture for Storytelling Depth
Aperture (measured in f-stops like f/1.8, f/4, f/11) is arguably your most powerful tool for adding artistic flair and narrative depth to your travel photos. It controls two things: the amount of light entering your lens and, crucially, the depth of field (DoF) – how much of your image is in sharp focus.
The "Mainstream" Application:
Most travelers learn that wider apertures (smaller f-numbers like f/1.8-f/4) create beautiful, blurry backgrounds (bokeh) for portraits, while narrower apertures (larger f-numbers like f/8-f/16) keep everything sharp for landscapes. While true, this is just scratching the surface.
The "Unconventional" Twist for Unique Shots:
- Wider Apertures (f/1.4 - f/2.8): Beyond Just Bokeh. Instead of just blurring out a busy background, use a very wide aperture to isolate a specific, compelling detail in a chaotic scene. Think of a street vendor’s weathered hands meticulously arranging spices in a Marrakech souk, with the vibrant, blurred chaos of the market swirling around them. Or the intricate embroidery on a traditional garment, making it pop against a soft background. This isn't just a pretty blur; it's a deliberate choice to draw the viewer's eye to a micro-story within a larger narrative. It creates intimacy and encourages the viewer to lean in.
- Anecdote: In the bustling markets of Oaxaca, Mexico, I used my 50mm f/1.8 lens wide open to focus on a single, perfectly ripe avocado in a vendor's basket. The shallow DoF made the vibrant green of the avocado sing, while the surrounding produce and people became a soft, colorful tapestry. It wasn't just an avocado; it was a testament to the market's freshness and life, seen through a very specific lens.
- Narrower Apertures (f/8 - f/16): Context and Immersion. While often used for sweeping landscapes, don't shy away from using narrower apertures in busy urban environments or for complex scenes. When you want everything in the frame to be sharp – from the foreground details to the distant skyline – a narrower aperture ensures your viewer can soak in every element. This is crucial when the context of a scene is as important as the subject itself. Imagine a bustling street scene in Tokyo, where you want to show the intricate signage, the diverse crowd, and the unique architecture all in sharp detail.
- Anecdote: During a visit to the ancient city of Petra, Jordan, I found myself standing before the iconic Treasury. Instead of focusing solely on the grand facade, I used f/11 to ensure that the intricate carvings, the rough texture of the sandstone cliffs surrounding it, and even the small figures of people at its base were all in sharp focus. This wasn't just a photo of the Treasury; it was a photo of the Treasury in its magnificent context, conveying the overwhelming scale and history of the site.
Actionable Tip:
Practice consciously choosing your aperture to tell a specific story. Do you want to highlight a tiny detail, or immerse your viewer in the entire scene? For isolating details, try f/1.8-f/2.8. For expansive, sharp scenes, aim for f/8-f/11.
---
3. Playing with Time: The Power of Shutter Speed for Dynamic Storytelling
Shutter speed (measured in fractions of a second, like 1/1000s, 1/60s, 2s) controls how long your camera's sensor is exposed to light. But more importantly for creative travel photography, it dictates how motion is captured.
The "Mainstream" Application:
Fast shutter speeds (1/500s and faster) are used to freeze action – think sports photography or capturing a bird in flight. Slower shutter speeds (1/30s and slower) are used for blurring water or light trails. Again, this is foundational, but we can push it further.
The "Unconventional" Twist for Unique Shots:
- Slightly Slower Shutter Speeds (1/30s - 1/125s): Capturing the Pulse of a Place. Instead of freezing every single person in a crowded market or street, intentionally use a slightly slower shutter speed. This allows for a subtle motion blur in moving elements (people walking, cars passing) while keeping your main subject or static elements sharp. This technique conveys the energy and movement of a place without making it a chaotic blur. It adds a dynamic, living quality that a perfectly frozen scene often lacks.
- Anecdote: In the vibrant night markets of Chiang Mai, Thailand, I found this technique invaluable. I set my shutter speed to around 1/60s. The delicious aroma of street food, the chatter of vendors, the endless stream of people – a slightly slower shutter speed allowed the colorful stalls and my chosen subject (a woman expertly grilling satay) to remain sharp, while the background crowd became a beautiful, painterly blur of motion and color. It felt alive, just like the market itself.
- Very Slow Shutter Speeds (1/2s - 30s+ with a tripod): Beyond Waterfalls and Light Trails. While light trails and silky water are beautiful, consider using very slow shutter speeds in crowded urban environments to make people "disappear" or become ghostly figures. This emphasizes the architecture or a static subject, stripping away the human clutter and revealing the timelessness of a place. It's a powerful way to show the contrast between fleeting human presence and enduring structures.
- Anecdote: Standing in the Piazza San Marco in Venice, a place notoriously packed with tourists, I wanted to capture the grandeur of the Basilica without a sea of selfie sticks. With my camera on a tripod, I used a 10-stop ND filter and a shutter speed of 30 seconds. The result was magical: the Basilica stood majestic and sharp, while the throngs of tourists became ethereal wisps, adding a ghostly, dreamlike quality that conveyed the ancient nature of Venice, untouched by the modern crowds. (Note: ND filters are key for longer exposures in daylight).
Actionable Tip:
Experiment with shutter speeds that are just slow enough to show motion, but not so slow that everything is unrecognizable. Try 1/60s for bustling streets. For truly unique, long exposures in daylight, invest in an ND filter and a tripod.
---
4. Embracing the Grain: Finding the ISO Sweet Spot for Authenticity
ISO (International Organization for Standardization) determines your camera sensor's sensitivity to light. A lower ISO (e.g., 100, 200) means less sensitivity and cleaner images, while a higher ISO (e.g., 1600, 3200+) means more sensitivity, allowing you to shoot in darker conditions, but with the trade-off of introducing "noise" or grain.
The "Mainstream" Application:
The common wisdom is to always keep your ISO as low as possible to avoid noise and achieve pristine, clean images. This is technically sound for maximum image quality.
The "Unconventional" Twist for Unique Shots:
- Higher ISO (800 - 6400+): Don't Fear the Grain, Embrace the Mood! In low-light situations, rather than using a flash (which often creates harsh, unnatural light and kills the ambiance), intentionally push your ISO higher. A little grain isn't always a flaw; it can add a raw, gritty, and authentic texture to your images, reminiscent of film photography. It enhances the mood and atmosphere, making the viewer feel like they are truly there, experiencing the dimly lit cafe, the moody street corner, or the intimate cultural performance.
- Anecdote: During a late-night Fado performance in a tiny, atmospheric tasca in Lisbon, the lighting was incredibly dim – just a few spotlights on the singers and guitarists. Using a low ISO would have resulted in a completely black photo or required a flash, ruining the intimate vibe. I pushed my ISO to 3200 (even 6400 on occasion, knowing my camera could handle it reasonably well). The resulting images had a beautiful, film-like grain that perfectly complemented the melancholic, soulful music. They weren't technically "perfect" in terms of cleanliness, but they perfectly captured the raw emotion and authentic spirit of the Fado.
Actionable Tip:
Get to know your camera's "acceptable" ISO limits. Most modern cameras produce very usable images up to ISO 3200, and often higher. Don't be afraid to push it in low light if it means capturing the moment without artificial light. Sometimes, a slightly noisy but atmospheric photo is far better than a technically clean but sterile one.
---
5. Setting the Scene: White Balance & Picture Styles for Emotion
Beyond the exposure triangle, two often-overlooked settings can dramatically influence the feel and emotional impact of your travel photos: White Balance and Picture Styles (or Color Profiles).
The "Mainstream" Application:
Most photographers leave White Balance on "Auto" and use standard picture styles. Auto WB tries to neutralize colors, making whites appear white under various lighting conditions. Standard picture styles aim for a balanced, generally pleasing look.
The "Unconventional" Twist for Unique Shots:
- Manual White Balance (K or Presets): Sculpting the Mood. Auto White Balance is great for accuracy, but sometimes accuracy isn't what you want. Manually setting your White Balance (either using Kelvin temperature or specific presets like "Cloudy," "Shade," or "Tungsten") allows you to intentionally warm or cool your images, enhancing the natural mood of a scene.
- Warm Tones: For sunsets, sunrises, cozy cafes, or intimate street scenes, try setting WB to "Cloudy" or "Shade" (which are warmer than Auto) or dialing in a higher Kelvin temperature (e.g., 6000K-7500K). This exaggerates the golden hour glow or the inviting warmth of indoor lighting.
- Cool Tones: For moody cityscapes, dramatic skies, or a sense of starkness, try a cooler WB like "Tungsten" or a lower Kelvin (e.g., 2500K-3500K).
- Anecdote: In Santorini, Greece, the sunsets are legendary. My camera's Auto WB kept trying to neutralize the incredible oranges and pinks, making them look less vibrant. By switching to a custom Kelvin setting of 7000K, I was able to capture the true, fiery intensity of the sunset over the caldera, making the colors explode without looking artificial.
- Picture Styles / Color Profiles (Flat or Neutral): The Post-Processing Advantage. While it’s always best to shoot in RAW for maximum flexibility, understanding your camera's Picture Styles (Canon) or Color Profiles (Nikon, Sony, Fuji) can give you a head start. Instead of "Standard" or "Vivid," try using "Neutral" or "Flat" profiles. These settings reduce contrast and saturation in the camera, producing a flatter image.
- Why is this "unconventional" and powerful? A flat profile preserves the maximum amount of detail in both the highlights and shadows, giving you far more information to work with when you edit your RAW files later. It's like starting with a blank canvas with all the paint options available, rather than a canvas that's already partially colored. This allows you to sculpt your final image with your unique vision in mind, creating a look that is truly your own and not dictated by the camera's internal processing.
Actionable Tip:
For White Balance, try shooting the same scene with Auto WB and then with a specific preset or Kelvin temperature. See how dramatically the mood changes. For Picture Styles, set your camera to "Neutral" or "Flat" and shoot in RAW. You'll be amazed at the flexibility you gain in post-production.
---
6. The "Pre-Visualization" Mindset: Seeing the Shot Before You Shoot
Ultimately, mastering camera settings isn't just about technical proficiency; it's about developing a "pre-visualization" mindset. This is the ultimate "before mainstream" technique. It means seeing the final image in your mind before you even raise your camera to your eye, and then knowing exactly which settings will help you achieve that vision.
The "Mainstream" Approach:
Point and shoot, hoping for the best, then crop and filter later.
The "Unconventional" Mindset:
This is where the magic happens. It’s a conscious process:
- Observe Deeply: Don't just look, see. What catches your eye? Is it a fleeting expression, a unique interaction, a play of light and shadow, an interesting texture, or a compelling pattern?
- Define the Story/Mood: What emotion or narrative do you want to convey? Is it joy, solitude, chaos, tranquility, wonder?
- Mentally Compose: How will you frame this? What elements will you include or exclude? Consider leading lines, rule of thirds, symmetry, or natural frames.
- Envision the Technicals: This is where the settings come in.
- Depth of field: Do I want a blurry background to isolate my subject (wide aperture like f/2.0), or do I want everything sharp to show context (narrow aperture like f/9)?
- Motion: Do I want to freeze the action (fast shutter like 1/500s), show a sense of movement (medium shutter like 1/60s), or create an ethereal blur (slow shutter like 2s)?
- Light/Grain: Is it dark? Do I embrace the grain for mood (higher ISO like 1600), or is there enough light for a clean shot (low ISO like 100)?
- Color/Mood: Does the scene have a natural warmth I want to enhance (warmer WB), or a cool, moody feel I want to emphasize (cooler WB)?
My Personal Anecdote:
I was in Havana, Cuba, enchanted by the vibrant colors and the old-world charm. I spotted an elderly man sitting on his porch, smoking a cigar, framed by a peeling turquoise wall and a bright yellow door. My first instinct was to just snap a photo. But I paused. I pre-visualized: I wanted to capture his wisdom, the texture of his skin, and the rich, faded colors of his surroundings, all while conveying the timelessness of Havana.
So, I set my aperture to f/2.8 to slightly blur the background details, making him pop. I ensured a shutter speed of 1/125s to freeze his expression. I nudged my ISO to 400 for a clean image in the soft afternoon light. And crucially, I set my White Balance to "Shade" to enhance the warm, nostalgic tones of the scene. The resulting photo wasn't just a snapshot; it was a portrait that spoke volumes about the man and the city, a truly unique piece of my travel story. It wasn't mainstream; it was Havana through my eyes.
Actionable Tip:
Before you press the shutter, take a moment. Close your eyes for a second, then open them and look at the scene again. What do you want the photo to look like? Then, consciously adjust your settings to match that vision. Practice this, and it will become second nature.
---
Your Journey to Uncharted Visuals Begins Now!
The world is full of incredible sights, and your camera is an incredibly powerful tool for capturing them. But don't let it be a passive recorder of what's already been seen a million times. By intentionally manipulating your camera settings – stepping away from the default, embracing the "unconventional" – you empower yourself to capture moments with a depth, emotion, and uniqueness that truly stands out.
This isn't about technical perfection; it's about creative expression. It's about telling your story of a place, not just documenting its existence. It’s about creating images that resonate, that transport, that make people pause their scroll and truly feel something. These are the photos that become viral, not because they’re generic, but because they are uniquely authentic.
So, next time you pack your bags, remember these tips. Experiment, make mistakes, and discover your own visual voice. Go forth and create images that are unmistakably yours, photos that capture the soul of a destination before it becomes just another Instagram trend.
What's your favorite "unconventional" camera setting for travel? Share your wisdom and your unique shots using #TripsoraUncharted in the comments below! We can't wait to see what you create.
---