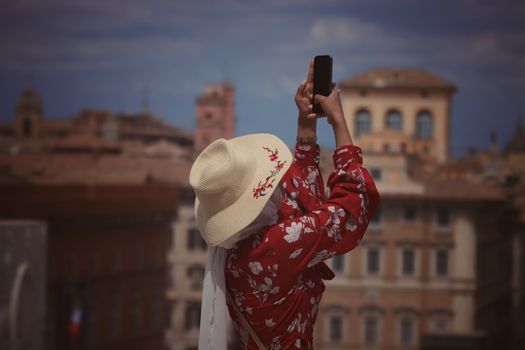
The Influencers’ Playbook: How to Take Instagram-Worthy Photos of Yourself (Without a Crew!)
I remember my first solo trip to Paris. Every iconic landmark, every charming café, I wanted to capture me in that moment. But instead of the dreamy, effortless shots I saw filling my Instagram feed, I ended up with a collection of awkward arm-length selfies, blurry strangers-taken-photos, or just… photos of the landmark, sans me. I felt like I was missing out on truly documenting my journey, my presence in these incredible places.
Sound familiar? You’re not alone. For years, I believed those stunning solo travel shots – the ones that look like they belong in a magazine – were reserved for influencers with dedicated photographers, expensive gear, and endless budgets. I’d scroll through Instagram, admiring the perfectly composed shots of travelers looking effortlessly chic against a backdrop of ancient ruins or a breathtaking sunset, and think, "How do they do that?"
Well, after countless trips, a lot of trial and error (and more than a few embarrassing moments wrestling with a tripod in public), I cracked the code. And guess what? It’s not about having a personal photographer or even the latest DSLR. It’s about smart techniques, a bit of planning, and a dash of confidence. These are the "secrets" Instagram influencers use every single day, and they're surprisingly accessible.
Today, I’m pulling back the curtain on everything I’ve learned. Get ready to transform your travel photography and capture the kind of epic, envy-inducing shots that truly reflect your adventures. Let’s dive in!
---
1. Your Secret Weapon: The Solo Photographer's Starter Kit (Under $50!)
Forget bulky camera bags and professional lenses. The core of an influencer’s solo setup is surprisingly simple and affordable. Your smartphone, plus these two game-changers, will revolutionize your travel photos.
a. The Mighty Tripod (and why it’s non-negotiable):
This is your personal photographer, always ready, always steady. A lightweight, portable tripod is the single best investment you’ll make.
* Recommendation: For phones, I swear by the Joby GorillaPod (around $20-40 on Amazon). Its flexible legs can wrap around railings, stand on uneven surfaces, or act as a stable base for your phone. If you want something more traditional and taller, a basic, compact travel tripod (like the Amazon Basics 50-inch Lightweight Tripod for about $15-25) is also fantastic. Just make sure it has a phone mount attachment.
* Why it works: It allows you to set up your shot, compose it perfectly, and step into the frame without relying on a stranger whose photography skills might be… questionable. Plus, it gives you the freedom to take multiple shots, experiment with poses, and capture longer exposures if you're into that.
b. The Remote Shutter (Your Invisible Hand):
This tiny Bluetooth clicker is the magic wand that makes those "candid" shots possible.
* Recommendation: Search "Bluetooth remote shutter for phone" on Amazon. They cost a mere $7-15 and are compatible with almost all smartphones.
* Why it works: No more running back and forth to hit the timer! You can be in position, looking natural, and snap away discreetly from a distance. I’ve used mine everywhere from the bustling markets of Marrakech to the serene rice paddies of Bali, and it’s truly a game-changer for capturing genuine moments.
c. Phone Camera Settings to Master:
Your smartphone is a powerful tool. Learn its capabilities:
* Grid Lines: Turn these on (Settings > Camera > Grid). They help you apply the "rule of thirds" for better composition.
* Burst Mode: Hold down the shutter button. This is fantastic for capturing movement – walking, spinning, laughing – and ensures you get at least one perfect frame.
* Portrait Mode: Blurs the background beautifully, making you stand out. Experiment with different F-stops (the number that controls blur intensity).
* 0.5x Wide-Angle Lens: Most newer phones have this. It’s brilliant for capturing expansive landscapes with you in the foreground, making your surroundings feel grander. Use it wisely to avoid distortion.
---
2. Chasing Light & Crafting Composition: The Golden Hour & Beyond
Influencers don’t just snap photos; they create them. And the biggest secret to a breathtaking shot? Light and composition.
a. The Golden Hour is Your Best Friend (and Blue Hour, too!):
* Golden Hour: The hour after sunrise and the hour before sunset. The light is soft, warm, and magical. It casts beautiful, long shadows and makes everything glow. This is prime time for those ethereal, dreamy shots. I once woke up at 5 AM in Santorini to catch the sunrise over the caldera, and the effort was so worth it – the light was absolutely divine, painting the white buildings in a soft, warm hue that photos simply adore.
* Blue Hour: The period just after sunset or before sunrise when the sun is below the horizon, and the sky takes on a deep, rich blue hue. Perfect for cityscapes with twinkling lights or moody, atmospheric portraits.
* Midday Sun Woes: Avoid direct midday sun if possible. It creates harsh shadows, makes you squint, and often blows out highlights. If you must shoot then, seek shade, or use backlighting for cool silhouettes (more on that below).
b. Mastering Composition: Framing Your Masterpiece:
* Rule of Thirds: Imagine your frame divided into nine equal squares by two horizontal and two vertical lines. Place your subject (you!) along these lines or at their intersections for a more balanced and engaging photo.
* Leading Lines: Use natural lines in your environment – roads, fences, rivers, architectural elements – to draw the viewer's eye towards you or a focal point. Think of standing at the end of a long pier or a grand avenue.
* Framing: Look for natural frames like archways, windows, tree branches, or even doorways. These add depth and a sense of intrigue to your photo. Standing under the Arc de Triomphe, framed by its massive arch, is far more impactful than just standing in front of it.
* Foreground Interest: Don't just focus on the background. Adding something interesting in the foreground (flowers, a local market stall, a part of a building) adds depth and layers to your image.
---
3. Posing Like a Pro: Natural Movement & Authentic Expressions
This is where many people freeze up. The key isn't stiff, forced poses, but natural movement that tells a story.
a. Movement is Magic:
Influencers rarely stand stock-still. They're walking, running, twirling, looking away, reaching out, or interacting with their environment.
* The "Walk Away" Shot: Set up your camera, start walking away from it (or towards it), and use your remote to snap multiple shots. Look back over your shoulder, or simply gaze into the distance. This creates a sense of journey and mystery. I’ve perfected this walking away shot on countless beaches, especially in places like the Maldives, where the vastness of the ocean makes for an incredible backdrop.
* Interaction: Are you at a café? Hold your coffee cup, look out the window. In a market? Engage with a stall, pick up some fruit. At a monument? Reach out as if touching it (without actually touching, of course!).
* The "Look Away" or "Candid" Gaze: Instead of staring directly at the camera, look off into the distance, down at your feet, or at something in your surroundings. This adds an element of candidness and allows the viewer to imagine what you're seeing or thinking.
b. Express Yourself Authentically:
* Genuine Smiles: Don't force it. Think of something genuinely funny or heartwarming. A true smile reaches your eyes.
* Thoughtful Gazes: Sometimes a pensive, thoughtful look is more impactful than a big grin, especially in front of historical sites or dramatic landscapes.
* Experiment with Angles: Try shooting from slightly above (slimming), slightly below (makes you look taller/more powerful), or straight on. Don't be afraid to sit, crouch, or lie down for unique perspectives.
---
4. Elevate Your 'Selfie' Game: Beyond the Arm's Length Shot
The traditional arm-length selfie has its place, but influencers take it to the next level.
a. The Wide-Angle "Selfie":
With your phone on a tripod and the 0.5x wide-angle setting, you can capture yourself within a much broader context. This isn't a selfie in the traditional sense, but it gives that intimate, "I'm here!" feel while showcasing the grandeur of your surroundings. Imagine yourself small against the vastness of the Grand Canyon, or nestled perfectly in a bustling European plaza.
b. Reflections & Shadows:
Look for puddles, mirrors, shiny surfaces, or even shop windows to capture unique reflective "selfies." Shadows can also create artistic, minimalist self-portraits. I once found a perfectly still puddle in front of the Eiffel Tower after a rain shower, and by setting my phone low, I captured an amazing reflection shot that looked incredibly artistic and unique.
c. The "Candid" Close-Up:
Set your camera on a tripod, frame your face or upper body, and then just live for a few moments. Drink your coffee, read a book, look at your phone (not scrolling, but looking at a map or something that implies travel). Use your remote shutter to snap bursts. These are the close-up, intimate shots that feel genuine and unposed.
---
5. The Editing Edge: Where Good Photos Become Great
This is truly the secret sauce. Raw photos are just the starting point. Influencers spend significant time editing to create their signature look. The good news? Powerful editing apps are free or very affordable.
a. Essential Free Apps:
* Lightroom Mobile (Free Version): My absolute go-to. You can adjust exposure, contrast, highlights, shadows, whites, blacks, saturation, vibrance, sharpness, and even apply selective adjustments (e.g., brightening just your face). The free version is incredibly robust.
* Snapseed (Free): Google's fantastic editing app. I love it for its "Healing" tool (to remove unwanted distractions like a stray person or rubbish) and "Selective Adjust" for precise local edits.
* VSCO (Free with Paid Presets): Offers beautiful, film-like filters (presets) that can give your photos a cohesive aesthetic. The free filters are a great starting point.
b. Key Adjustments to Master:
* Exposure: Brighten or darken the overall image.
* Contrast: Increase or decrease the difference between light and dark areas.
* Highlights & Shadows: Recover detail in blown-out bright areas or crushed dark areas.
* Whites & Blacks: Adjust the purest white and darkest black points for more punch.
* Saturation & Vibrance: Saturation affects all colors equally; vibrance boosts less saturated colors more, making it great for skin tones.
* Sharpness & Clarity: Add definition. Be careful not to overdo it.
* Color Grading (Optional): Play with temperature (warm/cool), tint (green/magenta), and individual color channels to create a specific mood. Influencers often have a consistent "look" across their feed, achieved through similar color grading.
c. Batch Editing for Consistency:
Once you find an editing style you love, save it as a preset in Lightroom Mobile. This allows you to apply the same look to multiple photos, giving your feed that professional, cohesive feel. I have a few custom presets I’ve developed over time – one for bright, airy beach shots, and another for moody, urban explorations. It saves so much time and ensures my gallery feels like a curated story.
---
6. The Mindset Shift: Conquering Awkwardness & Embracing the Solo Mission
Perhaps the biggest hurdle for solo self-photography is feeling self-conscious. Trust me, I've been there. Setting up a tripod in a busy square can feel incredibly awkward at first.
a. Who Cares What They Think?
This is your trip, your memories, your story. Most people are too wrapped up in their own worlds to pay much attention, and those who do are often admiring your dedication (or wishing they were doing the same!). I used to feel so embarrassed, but then I realized: I'm creating lasting memories, and that's far more important than a fleeting glance from a stranger. When I was in front of the Colosseum, setting up my tripod, I initially felt eyes on me. But then I looked around and saw dozens of people taking selfies, asking strangers for photos, or just absorbed in their own experience. My tripod and remote were just another way of capturing a moment, no different from them.
b. Practice Makes Perfect (and Faster):
The more you do it, the quicker and more comfortable you’ll become. Practice in less crowded spots first. Learn how to quickly set up your tripod, compose your shot, and get into position. This efficiency will boost your confidence.
c. Asking for Help (Wisely):
Sometimes, you just need a human. If you ask someone to take your photo, be specific!
* "Could you please take a photo of me with this background?"
* "Could you take a few photos? Hold the button down for a burst."
* "Can you make sure my head isn't cut off and the landmark is in the background?"
Show them an example on your phone if you can.
d. Safety First:
Never leave your gear unattended, especially in crowded areas. Be aware of your surroundings. If a spot feels unsafe, it's not worth the shot.
---
7. Storytelling Through Your Lens: Beyond the Pretty Picture
Finally, remember that your photos are more than just pretty pictures; they're snippets of your travel story.
a. Capture the Details:
Don't just focus on the grand landscapes. Photograph the local food, the intricate patterns of a mosaic, the unique street art, the smiling faces (always ask permission!), or the quirky details that make a place special. These add depth and context to your overall travel narrative.
b. Create a Series:
Think about how your photos will look together. Can you tell a mini-story with a sequence of shots? Maybe a series of you exploring a market, then enjoying a local dish, then relaxing by the beach. This is perfect for Instagram carousels or Reels.
c. Authenticity Over Perfection:
While these tips help you create stunning images, don't get so caught up in perfection that you forget to enjoy the moment. Some of the most cherished travel photos are the ones that are a little messy, a little candid, but perfectly capture the joy or wonder of the experience. The goal isn't to be an influencer, but to use their techniques to capture your authentic, amazing journey.
---
Your Epic Journey Awaits!
There you have it – the playbook for capturing amazing photos of yourself that Instagram influencers typically keep under wraps. You don't need a professional crew or a hefty budget; you just need a few smart tools, a keen eye for light, and the confidence to tell your own story.
From my awkward first attempts in Paris to confidently setting up my tripod in front of the vibrant street art in Berlin, I’ve seen firsthand how these techniques can transform your travel memories. Now it’s your turn.
So, pack your remote shutter, charge your phone, and get ready to create a feed full of breathtaking self-portraits that truly reflect the incredible adventurer you are. Go forth, explore, and capture every epic moment!
What's your biggest challenge when taking solo travel photos? Share your tips or questions in the comments below! And don't forget to share your amazing new shots with #TripsoraTravel and tag us @TripsoraOfficial – we can't wait to see your adventures!