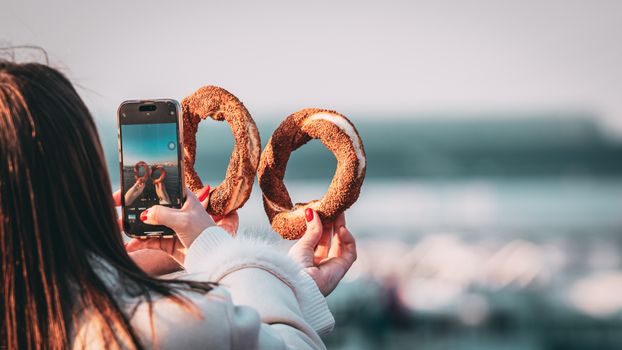
Snap Pro Food Photos: Your November 2025 Guide to Epic Eats That Go Viral!
I still cringe remembering "The Great Pizza Disaster of 2018." I was on a solo trip through Naples, Italy, buzzing with excitement over my first authentic Neapolitan pizza. It was a masterpiece of blistered crust, bubbling mozzarella, and vibrant San Marzano tomatoes. I whipped out my phone, eager to capture its glory. Flash on, overhead shot, hurried click. The result? A flat, greasy-looking disc shrouded in harsh shadows, utterly devoid of the magic I'd just witnessed. My Instagram caption, "Best pizza EVER!" felt like a lie next to that sad, sad photo.
Fast forward to November 2025. I’m sipping a spiced pumpkin latte at a cozy café in Bruges, Belgium, the warm glow of autumn leaves filtering through the window. My camera (or often, my trusty iPhone 17 Pro Max) is ready. The latte art is perfect, the flaky pastry beside it begging to be devoured. I take a moment, adjust my angle, use the window light, and click. The result? A warm, inviting shot that practically smells of cinnamon and comfort, garnering hundreds of likes and comments within minutes. That's the power of good food photography, my friends – it tells a story, evokes emotion, and makes people want to be right there with you.
November 2025 is a magical month for food. It’s the cusp of the holiday season, brimming with rich, comforting dishes, vibrant autumnal colors, and the promise of festive feasts. Whether you're documenting a Thanksgiving spread in the US, exploring Christmas markets in Europe, or savoring seasonal delights in Asia, this guide will equip you with the skills to capture those edible moments like a seasoned pro. Forget blurry, unappetizing snapshots. Let’s make your food photos sing!
1. The Golden Rule of Light: Your Best Friend (and Worst Enemy)
Light is the single most crucial ingredient in stunning food photography. Period. You can have the most exquisite dish, but without good light, it’s just... food.
My #1 Tip: Embrace Natural Light.
Forget your camera's built-in flash – it's the enemy of appetizing food. Always, always, always seek out natural light. This means a window, an open doorway, or even stepping outside.
- Side Lighting: My absolute favorite. Position your food so the light source is to its side. This creates beautiful shadows and highlights, adding depth and texture to your dish. Imagine a steaming bowl of butternut squash soup – side lighting will highlight the creamy texture and the delicate swirl of cream on top.
- Backlighting: This is fantastic for adding drama and a beautiful glow, especially to drinks, translucent foods, or dishes with steam. Place the light source directly behind your dish. You might need to use a reflector (a white piece of cardstock works wonders!) to bounce some light back onto the front of the food to prevent it from being underexposed. I once shot a stack of fluffy pancakes drizzled with maple syrup this way in a quaint café in Vermont last November, and the syrup practically glowed!
- Avoid Direct Overhead Sun: Unless you're going for harsh shadows and blown-out highlights, stay away from direct midday sun. Overcast days are actually fantastic for food photography because the clouds act as a giant natural diffuser, providing soft, even light.
Pro Hack:
If you’re stuck in a dimly lit restaurant (we've all been there!), scout for the table nearest a window. If that’s not an option, use your phone’s flashlight (or a friend’s!) as a subtle side light, bouncing it off a menu or napkin to soften it. It’s not ideal, but it’s better than flash!
2. Composition & Angles: Tell Your Food’s Story
Beyond just pointing and shooting, how you frame your food changes everything. Think of yourself as a storyteller, and the plate is your main character.
- The Overhead Shot (Flat Lay): This is the Instagram classic for a reason. It works best for dishes with a lot of toppings or intricate patterns (think pizza, smoothie bowls, charcuterie boards). Make sure you’re shooting directly from above, parallel to the table, to avoid distortion. Use a stool or stand if needed! I swear by this angle for capturing the vibrant chaos of a Moroccan tagine or a beautifully arranged platter of sushi.
- The 45-Degree Angle (Eye-Level): This is your versatile workhorse. It mimics how you'd naturally view a plate of food. It’s great for showing off the depth of a dish, like a layered lasagna or a hearty stew. This angle allows you to capture the steam rising from a hot dish, adding an element of freshness and warmth.
- The Eye-Level Shot: Perfect for towering creations like multi-layered cakes, stacked burgers, or tall drinks. This angle brings the viewer directly into the food's perspective, emphasizing its height and grandeur. I used this angle to capture an epic croquembouche at a patisserie in Paris last year, and it truly conveyed the dessert’s impressive scale.
Rule of Thirds:
Imagine your frame divided into nine equal sections by two horizontal and two vertical lines. Place your main subject (or key elements) along these lines or at their intersections for a more dynamic and engaging composition. Don't always center your food!
Leading Lines & Negative Space:
Use cutlery, napkins, or even the edge of a table to create leading lines that draw the viewer's eye towards your main subject. Don't be afraid of negative space – empty areas around your food can help it stand out and give the photo a clean, sophisticated feel.
3. Styling Your Edible Masterpiece: Props & Plating Secrets
You don't need a professional food stylist to make your dishes look incredible. A few simple tricks can elevate your photos from amateur to art.
- Keep it Real, Keep it Simple: The best food photos feel authentic. Don't over-style. Focus on making the food itself look delicious. A few crumbs, a drizzle of sauce, or a perfectly placed herb can make a huge difference.
- Plating is Key: Before you even think about your camera, think about how the food is arranged on the plate. Chefs spend years mastering this! Look for balance, color contrast, and texture. Don't overload the plate.
- Garnishes are Gold: A sprinkle of fresh herbs, a zest of citrus, a dusting of powdered sugar, or a few artfully placed berries can instantly brighten a dish and add visual appeal. For November, think cinnamon sticks, cranberries, rosemary, or toasted nuts.
- The "Action" Shot: Capturing a fork spearing a piece of pasta, a hand pouring syrup, or steam rising from a hot beverage adds dynamism and makes the food feel alive and inviting. These are incredibly shareable!
- Backgrounds & Props:
- Textured Surfaces: A rustic wooden table, a marble countertop, or even a simple linen napkin can provide a beautiful, non-distracting backdrop. I often carry a small, foldable fabric backdrop or a piece of textured cardboard in my travel bag.
- Minimalist Props: Less is more. A single fork, a crinkled napkin, a small glass of water, or a sprig of the herb used in the dish can enhance the story without overwhelming the food. For November, consider cozy elements like a chunky knit sweater in the background, a small decorative gourd, or a flickering candle (safely!).
- Color Harmony: Choose props and backgrounds that complement (not compete with) the colors of your food. Earthy tones, neutrals, and muted colors often work best.
Personal Anecdote:
I was at a bustling street food market in Hanoi last March, trying to photograph a vibrant Bun Cha. The plastic table and fluorescent lights were a nightmare. I quickly bought a cheap, patterned fabric placemat from a nearby stall for about 20,000 VND (less than $1 USD), draped it over my lap, and used it as a backdrop. I then borrowed a small ceramic bowl from the vendor for my dipping sauce. Suddenly, the chaotic dish looked artfully composed against the patterned fabric. It went viral!
4. Gear & Gadgets: You Don't Need a DSLR to Go Pro!
While a fancy DSLR or mirrorless camera offers incredible control, your smartphone is a powerful tool, especially with the advancements expected by November 2025.
- Smartphone Photography (iPhone 17 Pro Max, Google Pixel 10 Pro, etc.):
- "Pro" or "Manual" Modes: Many modern smartphones offer manual controls for ISO, shutter speed, and white balance. Experiment with these! Lower ISO for less grain, adjust white balance to accurately capture colors.
- Portrait Mode: Use this judiciously for food. It creates a beautiful depth-of-field effect (bokeh) that blurs the background, making your food pop. It works best for single items like a cocktail or a cupcake.
- External Lenses: Clip-on macro lenses can transform your phone into a close-up powerhouse, perfect for capturing intricate details like the flaky layers of a croissant or the tiny seeds on a berry. You can find decent sets online for $20-$50.
- Clean Your Lens! This sounds obvious, but a smudged phone lens is the #1 cause of blurry, hazy photos. A quick wipe on your shirt is often enough.
- DSLR/Mirrorless Camera Basics:
- Aperture (f-stop): Use a wide aperture (smaller f-number, e.g., f/1.8, f/2.8) to create that creamy, blurred background (bokeh) that makes your food stand out.
- ISO: Keep your ISO as low as possible (100-400) to avoid graininess, especially in good light.
- Shutter Speed: With good light and a stationary subject, you don't need a super-fast shutter speed. Just ensure it's fast enough to avoid blur from camera shake (e.g., 1/60th of a second or faster).
- Lens Choice: A 50mm f/1.8 prime lens (often called a "nifty fifty") is an affordable and fantastic choice for food photography, offering great sharpness and beautiful bokeh. A macro lens is also excellent for close-ups.
- Essential Accessories:
- Tripod/Mini-Tripod: Crucial for sharp shots, especially in lower light or for overhead flat lays. A small Gorillapod for your phone or camera is a great travel companion (around $30-$60).
- Reflector/Diffuser: As mentioned, a white cardstock, a piece of foil, or a dedicated photography reflector can manipulate light beautifully.
- Portable LED Light: If natural light is truly absent, a small, adjustable LED panel can be a lifesaver. Look for ones with adjustable color temperature (warm to cool) for around $50-$100.
5. Post-Processing Power: The Magic Touch
Editing is where your good photos become great. Don't skip this step! It's not about making your food look fake, but enhancing its natural appeal.
- My Go-To Apps (November 2025 Editions):
- Adobe Lightroom Mobile: My absolute favorite. It offers powerful controls for exposure, color, and selective adjustments. The free version is incredibly capable.
- Snapseed (Google): Free, intuitive, and packed with tools. Great for quick fixes and specific adjustments like selective brightening or sharpening.
- VSCO: Known for its beautiful filters and film-like presets.
- Key Adjustments to Master:
- Exposure: Brighten or darken your image. Most food photos benefit from being slightly brighter.
- Contrast: Adds punch and definition. Don't overdo it!
- Highlights & Shadows: Recover detail in blown-out bright areas or bring out details in dark shadows.
- White Balance: Crucial for accurate colors. Adjust the "temperature" (warmer/cooler) and "tint" (magenta/green) until whites look truly white and colors are natural. Food should look appetizing, not sickly yellow or blue.
- Saturation & Vibrance: Use sparingly! Saturation boosts all colors equally; vibrance boosts muted colors more. Aim for natural, rich colors.
- Sharpness: A subtle increase can make details pop.
- Cropping & Straightening: Correct crooked horizons and crop out distracting elements to improve composition.
- Removing Distractions: Use the healing brush or spot removal tool in apps like Lightroom or Snapseed to eliminate unsightly crumbs, smudges on the table, or random background elements.
Anecdote:
I was in a bustling market in Lisbon last spring, trying to get a shot of a delicious pastel de nata. The lighting was tricky, and a rogue fly kept landing on the pastry (classic market experience!). I managed to get the shot, but it was a bit dim, and there was a distracting stain on the counter. A few minutes in Snapseed: I brightened the exposure, adjusted the white balance to bring out the golden crust, and used the healing tool to zap the stain. The result? A perfectly inviting pastry, no flies or stains in sight!
6. The November 2025 Vibe: Seasonal Delights & Trends
November isn’t just a month; it’s a mood. Lean into it!
- Autumnal Aesthetics: Think warm, inviting colors – deep reds, burnt oranges, golden yellows, rustic browns. These colors naturally occur in seasonal produce like pumpkins, squash, cranberries, apples, and root vegetables.
- Comfort Food Focus: November is synonymous with comfort. Capture the steam rising from a hearty stew, the melted cheese on a gratin, the glossy glaze of a pie, or the frothy top of a hot chocolate. These evoke warmth and coziness.
- Holiday Prep & Feasts: Thanksgiving in North America, early Christmas markets across Europe (like the famous Strasbourg Christkindelsmärik opening late November!), and general festive preparations create incredible photo opportunities.
- Thanksgiving Table: Focus on the abundance – a beautifully carved turkey, vibrant side dishes, a slice of pumpkin pie. Use low angles to emphasize the spread.
- Christmas Markets: Capture steaming mugs of Glühwein (around €4-€6 in Germany), roasted chestnuts, gingerbread, and festive pastries. The soft glow of market lights makes for magical backlighting.
- Emerging Food Trends (November 2025): Keep an eye on what's trending. By November 2025, we might see a continued rise in plant-based comfort foods, gourmet takes on classic holiday dishes, or perhaps a new superfood making its way into seasonal recipes. Research food blogs and culinary magazines for the latest buzz. For instance, I'm already seeing "elevated mushroom dishes" and "artisanal hot ciders" popping up on menus in anticipation of the cooler months.
Make Them Drool, Make Them Share!
Food photography is about more than just documenting what you eat; it's about sharing an experience, invoking a memory, and inspiring others. By November 2025, with these tips in your arsenal, you'll be capturing culinary moments that are not just beautiful, but truly magnetic.
So, next time you're faced with a plate of deliciousness, take a moment. Find that light, compose your shot, style it simply, and edit with care. Your followers (and your taste buds!) will thank you.
Now go forth, explore, eat, and snap those incredible, shareable food photos! Don't forget to tag @TripsoraOfficial and use #TripsoraEats on your next culinary adventure. We can't wait to see what you're devouring and documenting this November!
---