Master Indoor Shots: Lighting Tricks That Blow Your Mind (and Your Instagram Feed!)
I still remember the crushing disappointment. It was my first trip to Paris, and I was standing in the Louvre, awe-struck by masterpieces like the Mona Lisa and the Venus de Milo. My camera was glued to my eye, snapping away, convinced I was capturing pure magic. Later that evening, back in my tiny Montmartre hotel room, I uploaded the photos, heart pounding with anticipation.
The result? A grainy, blurry mess. Dark shadows obscured intricate details. Famous artworks looked like they were shot in a cave. My "masterpieces" were barely distinguishable, let alone Instagram-worthy. I felt a pang of despair. How did all those other travel bloggers get those impossibly vibrant, perfectly lit indoor shots? Was there some secret club I wasn't invited to?
Fast forward a few years, countless hours of practice, and more than a few "aha!" moments, and I can confidently say: there are secrets. But they're not exclusive. They're lighting tricks, simple techniques, and a shift in perspective that can transform your indoor travel photography from blurry disappointments to mind-blowing, shareable works of art.
Forget expensive gear – while a good camera helps, most of these tips are entirely applicable to your smartphone. It’s all about understanding light, manipulating it, and sometimes, just waiting for it. Are you ready to dive into the dazzling world of indoor lighting and make your travel photos truly shine? Let's go!
Section 1: The Golden Rule – Befriend Natural Light (Even Indoors!)
Natural light is your best friend, your secret weapon, and often, it's absolutely free. Many indoor spaces, from grand museums to cozy cafes, have hidden pockets of incredible natural light just waiting to be discovered.
My Louvre Redemption Story:
That first Louvre trip was a bust, but on a subsequent visit, I learned my lesson. Instead of firing off shots randomly, I started looking for light. I noticed how the light streamed through the massive skylights in the Richelieu wing, creating dramatic pools on the sculptures below. I saw how the soft glow from the windows in the Denon wing beautifully illuminated the classical paintings.
Actionable Tips for Natural Light:
- Seek the Windows: This might seem obvious, but many people forget to actively scout for windows. Position your subject (or yourself, for a selfie) near a window. The light will be soft, even, and flattering.
- Pro Tip: If the sun is directly blasting through, causing harsh shadows, move slightly to the side or wait for a cloud. Alternatively, use a sheer curtain (if available, like in a hotel room) as a natural diffuser.
- Look for Reflections: Glass cases in museums, polished floors, even puddles outside a doorway – these can bounce light back onto your subject, brightening shadows.
- Use Windows as Backlight (Strategically): If you're shooting a silhouette or want to create a dramatic halo effect, place your subject between you and a brightly lit window. Just be careful not to blow out the background entirely unless that's your artistic intention.
- Embrace the "Golden Hour" Indoors: Just like outdoors, the light filtering through windows during sunrise or sunset can be incredibly warm and magical, casting long, interesting shadows and adding a painterly quality to your shots. I once captured a breathtaking shot of my morning coffee in a Reykjavik cafe, the low Icelandic sun streaming through the window, making the steam practically glow.
- Turn Off Overhead Lights (Sometimes): Fluorescent or harsh overhead lighting can cast ugly color tints and shadows. If natural light is sufficient, try turning off artificial lights to get a cleaner, more consistent light source.
Section 2: Mastering Low Light – Embrace the Mood (Don't Fight It!)
Not every indoor space is bathed in glorious natural light. Think ancient cathedrals, dimly lit jazz clubs in New Orleans, or atmospheric restaurants in Rome. Instead of lamenting the lack of light, learn to embrace the mood it creates.
My Vatican City Challenge:
The Sistine Chapel, for example, is notoriously dark (and photography is strictly forbidden, but let's imagine a less holy, similarly dim space!). But even in other sections of the Vatican Museums, the lighting can be challenging. I learned that trying to make a dark space look bright often results in noisy, artificial-looking photos. The trick is to lean into the drama.
Actionable Tips for Low Light Photography:
- Stabilize Your Shot (Crucial!): In low light, your camera's shutter will stay open longer to gather enough light. Any movement will result in blur.
- Tripod/Monopod: The ultimate solution. Many museums don't allow tripods, but a small, flexible Gorillapod (around $20-40 USD) can sometimes be discreetly used on a bench or railing.
- Improvise a Tripod: Lean against a wall, rest your camera on a table, a backpack, or even a stack of books. The goal is absolute stillness.
- Breath Holding & Elbows In: For handheld shots, hold your breath, tuck your elbows into your sides, and press the shutter gently.
- Increase ISO (Carefully): ISO controls your camera's sensitivity to light. Higher ISO = brighter image, but also more "noise" (graininess).
- For Smartphones: Many phone camera apps have a "Pro" or "Manual" mode where you can adjust ISO. Experiment! Start at 400-800 and go up if needed, but be aware of the trade-off.
- For DSLRs/Mirrorless: Don't be afraid to go up to ISO 1600, 3200, or even higher, especially on newer cameras. Modern noise reduction software is incredible.
- Use a Wider Aperture (Lower f-number): A wider aperture (e.g., f/1.8, f/2.8) lets in more light and creates that beautiful blurred background (bokeh). This is excellent for focusing on a specific detail in a dimly lit scene.
- Smartphones: "Portrait Mode" often simulates a wide aperture, but dedicated camera apps might offer more control.
- DSLRs/Mirrorless: Use a fast prime lens (e.g., 50mm f/1.8, often around $100-250 USD) – they are game-changers for low light.
- Slow Shutter Speed (with Stability): If you're stable, a slow shutter speed (e.g., 1/15th of a second, 1/2 second) can capture incredible detail in low light. This is how you get those moody, atmospheric shots without resorting to harsh flash. Just remember: absolute stillness is key.
- Shoot in RAW (if possible): RAW files contain more data than JPEGs, giving you far more flexibility to recover details from shadows and highlights in post-processing without introducing as much noise.
Section 3: Artificial Light Hacks – Beyond the Built-in Flash
Sometimes, natural light is non-existent, and low light isn't the mood you're going for. This is where you get creative with artificial light sources. And no, I don't mean blinding everyone with your harsh on-camera flash!
My Prague Cafe Discovery:
I was once in a charming, but very dark, underground cafe in Prague, trying to get a decent shot of a delicious trdelník. My phone's flash made it look like a crime scene. Then, I noticed a small, dim table lamp nearby. A lightbulb went off (pun intended!). I positioned the trdelník so the lamp was just out of frame, acting as a soft, directional light source. The result? A warm, inviting shot that looked professional.
Actionable Tips for Artificial Light:
- Use Existing Lamps & Fixtures: Look around! Table lamps, floor lamps, even decorative string lights can be fantastic light sources.
- Positioning: Place the light source to the side or slightly behind your subject for more dramatic and interesting shadows, adding depth. Avoid placing it directly in front, which can flatten the image.
- Color Temperature: Be aware that different light bulbs emit different color temperatures (warm yellow, cool white). Embrace it for mood, or adjust your camera's white balance if you want true colors.
- Your Phone's Flashlight (Not the Camera Flash!): The flashlight on your phone is a surprisingly versatile tool.
- Off-Camera Fill Light: Have a friend hold their phone flashlight off-camera, aiming it at your subject from the side or slightly above. This provides directional light without the harshness of the camera's built-in flash.
- DIY Diffuser: Place a piece of tissue paper, a white napkin, or even a finger over the phone flashlight to soften the light.
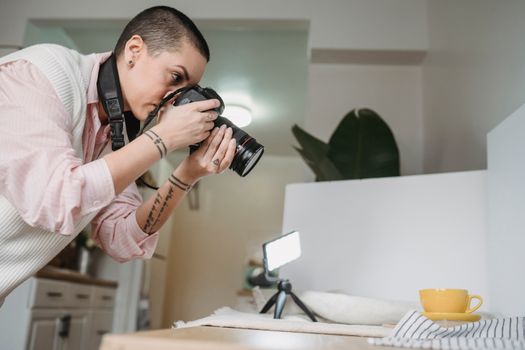
- Portable LED Lights: These are a game-changer for serious travel photographers. Small, battery-powered LED panels (like the Godox ML60, or even cheaper pocket LEDs starting around $30-50 USD) offer adjustable brightness and color temperature. They're lightweight and fit easily in a backpack. I always carry a small Aputure MC (around $90 USD) – it’s magnetic and can stick to metal surfaces, perfect for impromptu lighting setups in hotel rooms or cafes.
- Reflectors (DIY or Pro): A simple white piece of cardstock, a white napkin, or a small collapsible reflector (around $10-20 USD) can bounce light onto your subject, filling in shadows and brightening faces. This works wonders when you have a single light source (like a window or lamp).
Section 4: Composition & Angles – Light's Best Friend
Even with perfect light, a poorly composed photo falls flat. Composition is how you arrange elements in your frame, and it works hand-in-hand with light to create stunning images.
My Kyoto Temple Serenity:
In a quiet temple garden in Kyoto, I found a beautiful stone lantern perfectly illuminated by a ray of morning sun. Instead of just shooting it straight on, I got low, composing the shot so the light ray created a leading line directly to the lantern, with the soft shadows of the surrounding foliage framing it. The light was good, but the composition made it art.
Actionable Tips for Composition:
- Rule of Thirds: Imagine your frame divided into a 3x3 grid. Place your main subject along the lines or at their intersections. This creates a more balanced and engaging image than simply centering everything. Most cameras and phones have a grid overlay option – use it!
- Leading Lines: Use natural lines in the environment (hallways, railings, patterns on the floor, even light rays!) to draw the viewer's eye towards your subject.
- Framing: Use doorways, arches, windows, or even tree branches (if shooting through an opening) to create a natural frame around your subject. This adds depth and context.
- Angles, Angles, Angles:
- Get Low: Shooting from a low angle can make your subject appear more grand or imposing, and can help you isolate it against a cleaner background (like a ceiling instead of a cluttered floor).
- Shoot High: A high angle can give a sense of scale, show patterns on the floor, or make a subject appear more vulnerable.
- Experiment: Don't just shoot from eye level. Walk around, squat, stand on a chair (safely!), and try different perspectives.
- Negative Space: Don't be afraid of empty space! It can make your subject stand out and create a sense of calm or drama. Think of a single statue in a vast, well-lit hall.
Section 5: Post-Processing Magic – Enhancing Your Light
Even the best-lit photos can benefit from a little post-processing. This isn't about faking it; it's about enhancing what's already there, making your images pop and giving them that professional polish. Think of it as developing a photo in a digital darkroom.
My Icelandic Hotel Room Glow:
I took a beautiful shot of the northern lights from my hotel room in Iceland, but the interior of the room was a bit underexposed. A quick edit in Lightroom Mobile brought out the details in the cozy decor, balanced the exposure with the vibrant sky outside, and made the whole scene feel even more magical.
Actionable Tips for Post-Processing:
- Adjust Exposure: This is your starting point. Brighten underexposed areas or darken overexposed ones. Be subtle!
- Highlights & Shadows: These sliders are incredibly powerful for indoor shots.
- Reduce Highlights: If a window or light source is too bright, reducing highlights can bring back detail without darkening the rest of the image.
- Boost Shadows: Lift shadows to reveal details in darker areas, but don't overdo it, or your photo will look flat and unnatural.
- White Balance: Indoor lighting can often have a warm (yellow/orange) or cool (blue) cast. Adjust your white balance to make whites truly white, or embrace the warm/cool tones for artistic effect.
- Tools: Lightroom Mobile (free), Snapseed (free), VSCO (free with paid features) are excellent phone apps. For desktop, Adobe Lightroom and Photoshop are industry standards.
- Clarity & Dehaze: These can add punch to your image, making details sharper and colors more vibrant. Use sparingly!
- Noise Reduction: If you shot at a high ISO in low light, your photo might be grainy. Most editing apps have a noise reduction slider. Again, use with caution, as too much can make your image look plastic-y.
- Selective Adjustments: Use brushes or radial/linear gradients (available in most advanced apps) to brighten specific areas (like a person's face) or darken distracting backgrounds without affecting the entire image.
Section 6: Gear & Gadgets – Simple Tools for Big Impact
While I said you don't need expensive gear, a few affordable additions can significantly elevate your indoor photography game.
- Smartphone Tripod/Grip: Even a tiny desktop tripod or a sturdy grip (like a Joby GripTight ONE, around $20 USD) will improve stability dramatically for low-light phone shots.
- Clip-on Smartphone Lenses: A wide-angle or macro lens attachment (from brands like Moment or cheaper alternatives, starting around $20-100 USD) can open up new creative possibilities indoors. A wide-angle is great for capturing grand interiors, while a macro lens reveals intricate details.
- Mini Reflector/Diffuser Kit: A 5-in-1 collapsible reflector (around $15-30 USD) is incredibly versatile. It includes gold, silver, white, black, and translucent surfaces for bouncing light, adding warmth, or diffusing harsh light.
- Small LED Panel Light: As mentioned before, a pocket-sized LED light is invaluable for adding controlled, soft light when natural light is absent. The Aputure MC (around $90 USD) is my personal favorite for its magnetic back and full-color spectrum. For a budget option, look for generic RGB LED video lights on Amazon for around $30-50 USD.
- Cleaning Cloth: A microfiber cloth (a few dollars) is essential. Fingerprints and dust on your lens will degrade your image quality, especially in challenging lighting.
Section 7: Specific Scenarios – Putting it All Together
Let's apply these principles to common indoor travel scenarios:
- Museums & Art Galleries:
- Challenge: Dim lighting, no flash allowed, glass reflections.
- Strategy: Prioritize natural light from windows or skylights. Use a wide aperture lens (f/1.8-2.8) and increase ISO carefully. Stabilize your camera on a railing or bench (if allowed). Look for interesting light play on sculptures. Use selective post-processing to lift shadows on artworks. Personal touch: I love finding a museum bench near a window and capturing a quiet moment of reflection, often with a person silhouetted against the light.
- Cafes & Restaurants:
- Challenge: Cozy but often dark, mixed lighting sources.
- Strategy: Grab a table near a window. Use existing table lamps as your primary light source, positioning them creatively. Use your phone flashlight as an off-camera fill light. Focus on food details with a wide aperture to get that delicious bokeh. Personal touch: In a Parisian bistro, I once used the light from a nearby streetlamp filtering through the window, combined with a small table lamp, to perfectly illuminate my croque monsieur – pure magic!
- Hotels & Airbnbs:
- Challenge: Can be bland or have harsh overhead lighting.
- Strategy: Open all curtains and blinds immediately! Arrange elements (your luggage, a book, a coffee cup) to catch the natural light. Use bedside lamps or desk lamps as accent lighting. If shooting a person, place them facing the window. Personal touch: I always try to capture the "morning light" shot in my hotel room, showing the view outside framed by a cozy interior – it tells a story.
- Markets & Souks:
- Challenge: Bustling, often crowded, mixed light from stalls and overhead.
- Strategy: Look for shafts of light cutting through awnings or doorways. Focus on individual vendors or products that are well-lit. Embrace the chaos and color! Use a fast shutter speed to freeze motion. Personal touch: In the Grand Bazaar in Istanbul, I found a stall selling colorful spices, perfectly illuminated by a single hanging bulb. I shot from a slightly low angle to emphasize the vibrant mounds of spice, with the light creating a beautiful glow.
The Final Word: Practice, Experiment, and Share!
The journey to stunning indoor photography is all about practice and experimentation. Don't be afraid to try new things, even if they feel silly at first. Take 100 bad photos to get one truly amazing one. That’s how we learn!
Remember, the goal isn't just to capture a memory, but to tell a story. Light is your narrator, your mood-setter, your secret ingredient. By understanding and manipulating it, you'll transform your travel photos from mere snapshots into captivating visual narratives that truly blow minds.
Now it's your turn! Grab your camera (or phone!), head to your next indoor adventure, and put these tricks to the test. I can't wait to see what you create.
What are your go-to indoor lighting tricks? Share your best tips and favorite editing apps in the comments below! And don't forget to tag #TripsoraLights on Instagram so we can see your mind-blowing indoor shots!
---