The Glow-Up Guide: Lighting Tricks for Stunning Indoor Shots Instagram Influencers Don't Want You to Know
Let me take you back to a rainy afternoon in Edinburgh. I was tucked away in a cozy, dimly lit pub, The Last Drop, a place steeped in history and charm. The kind of place you have to photograph. I ordered a hearty haggis, neeps, and tatties, excited to capture the rustic ambiance. My phone came out, I snapped a few shots, and… ugh. Everything looked flat, grainy, and just plain sad. The vibrant colors of the dish were muted, the antique wood paneling was a dark blob, and my face looked like I’d just heard a ghost story, not enjoyed a delicious meal.
Sound familiar?
For years, my indoor travel photos were a source of frustration. While my outdoor shots often popped, the moment I stepped inside a beautiful museum, a bustling market, or a charming cafe, my camera seemed to give up. Yet, I’d scroll through Instagram, seeing influencers effortlessly capture the magic of these exact same spaces. Their photos glowed, they had depth, and every detail was perfectly illuminated. What was their secret?
Well, my friends, after countless hours of experimenting, countless blurry shots, and a deep dive into the dark (pun intended) art of photography, I’ve cracked the code. And guess what? It’s not expensive gear, a personal lighting crew, or even a degree in photography. It’s about understanding light – and a few sneaky tricks.
Today, I’m pulling back the curtain on the lighting secrets that influencers guard with their lives. These aren't just tips; they're game-changers that will transform your indoor travel photography from "meh" to "OMG, where is that?!" Get ready to make your followers wonder if you hired a professional photographer, because your photos are about to shine.
1. The Undisputed King: Mastering Natural Light (Even Indoors!)
This is the holy grail, the secret sauce, the foundation of almost every stunning indoor shot you see. Natural light is soft, flattering, and free! The trick isn't finding it, but using it strategically.
My "Aha!" Moment in Santorini:
I remember staying at a beautiful cave hotel in Oia, Santorini. The rooms, while stunning, could be quite dark. One morning, I noticed a sliver of sunlight streaming through the small, arched window, hitting just a corner of our bed. Instead of trying to light up the whole room, I focused on that one spot. I placed my coffee cup, a book, and my hat in that sunbeam, and voila! The resulting photo was pure magic – warm, inviting, and perfectly lit, with the rest of the room fading into a soft, atmospheric blur. It was one of my most liked photos that year, and it cost me nothing but observation.
Actionable Tips for Natural Light Mastery:
- Hunt for the Window: Always, always orient your subject (or yourself) towards the largest window or light source. This is your primary light.
- The "Golden Hour" Indoors: Just like outdoors, the light is softer and warmer closer to sunrise and sunset. If you're in a cafe or hotel with large windows, try to shoot during these times.
- Use Curtains as Diffusers: Sheer curtains aren't just for privacy; they're natural diffusers! They soften harsh sunlight, preventing blown-out highlights and deep shadows. If there are no sheers, a thin white scarf or even a white bedsheet held up by a friend can work wonders.
- Befriend the Reflector (DIY Style!): Light loves to bounce. A white wall opposite your window is a natural reflector, filling in shadows. No white wall? A white menu, a napkin, a piece of cardboard, or even a friend wearing a light-colored shirt can bounce light back onto your subject. I’ve used the silver foil from a chocolate bar in a pinch – don't knock it 'til you try it!
- Angles are Everything:
- Front-lit: Light directly on your subject for clear, vibrant details.
- Back-lit: Light behind your subject for dreamy halos and dramatic silhouettes (think someone looking out a window).
- Side-lit: Light from the side creates depth and dimension, highlighting textures. Experiment!
2. Taming the Beast: Artificial Light Hacks (No Fancy Gear Needed!)
Natural light isn't always an option, especially in historic sites, museums, or those atmospheric evening restaurants. This is where most people give up and resort to harsh flash. Don’t! Artificial light can be your friend if you know how to manipulate it.
My Jazz Club Revelation in New Orleans:
I was at The Spotted Cat Music Club on Frenchmen Street in New Orleans, soaking in the soulful jazz. The club was dimly lit, relying on a few scattered lamps and stage lights. My first attempts to capture the vibe were grainy messes. Then, I noticed a small, decorative lamp on a table nearby. Instead of pointing my phone at the stage, I subtly positioned myself so the lamp provided some directional light on the musician I wanted to feature. It wasn't perfect, but it was enough to lift the shadows and give a hint of detail, preserving the moody ambiance without resorting to a blinding flash.
Actionable Tips for Artificial Light Hacks:
- Identify Your Best Source: Look for lamps, sconces, or even strategically placed overhead lights that offer a softer, more diffused glow. Avoid harsh, direct overhead fluorescent lights if possible – they create unflattering shadows.
- Bouncing is Key: Just like with natural light, bouncing artificial light off a white ceiling or wall can soften it dramatically. If you have a small LED light (more on that next!), point it at a wall, not directly at your subject.
- Use Multiple Light Sources: Instead of one harsh light, try to use two or three weaker sources to create a more even, flattering illumination. A lamp on one side, a ceiling light bounced off a wall on the other.
- Your Phone's Flash as a Fill (Carefully!): Never point your phone's built-in flash directly at your subject. It creates harsh, flat images. Instead, use another phone's flashlight (or a small LED) held off-camera and pointed at a wall or ceiling to bounce light, or use it subtly as a fill light from the side, not head-on.
- Embrace the Mood: Sometimes, low, warm artificial light is the mood. Don't fight it. Adjust your camera's white balance to "tungsten" or "incandescent" to correct for the orange cast, or lean into it for a cozy, nostalgic feel.
3. The Influencer's Secret Weapon: Budget-Friendly Portable Lighting & Gadgets
Okay, this is where a tiny investment can yield professional-grade results. While influencers might have big studio lights, they also rely on incredibly compact, powerful tools that fit in their carry-on.
My Lume Cube Love Affair in a Dublin Pub:
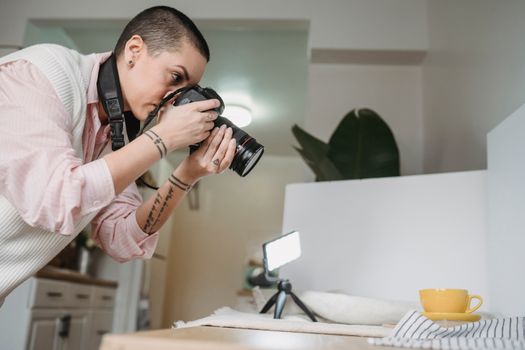
I was exploring a traditional pub in Dublin, "The Brazen Head," Ireland's oldest pub. It was wonderfully atmospheric, but also quite dark. I pulled out my secret weapon: a small, credit-card-sized LED light panel (I use an Ulanzi VL49, which cost me about €25 on Amazon). I placed it on the table, pointing it slightly away from my pint of Guinness and the pub's ancient stone wall, letting it bounce just enough light to illuminate the frothy head and the intricate details of the wall without destroying the mood. The difference was night and day – literally! The photo was crisp, warm, and perfectly captured the pub's historic charm.
Actionable Tips for Gadget-Assisted Lighting:
- Mini LED Panels (My Top Pick!): These are game-changers. Brands like Lume Cube, Ulanzi, and Apurture offer compact, rechargeable LED lights with adjustable brightness and sometimes even color temperature. They range from €20-€100 and are worth every penny. Use them off-camera, bounced, or diffused.
- Clip-On Ring Lights for Phones: For selfies or close-ups, a small clip-on ring light (around €10-€20) provides even, flattering light, minimizing shadows on your face.
- Portable Diffusers: You can buy small, collapsible diffusers (like a 5-in-1 reflector kit, usually under €30) that fit in your bag. They soften any harsh light source, making it more flattering.
- Mini Tripods/Gorilla Pods: For low-light situations, stability is crucial to avoid blurry photos. A small tripod or a flexible GorillaPod allows you to use slower shutter speeds, letting in more light without increasing graininess (ISO). This is especially useful in museums or cathedrals where flash is forbidden.
4. Composition & Angles: Making Light Work for You
Lighting isn't just about brightness; it's about how light interacts with your scene. Thoughtful composition can turn an ordinary light source into an artistic element.
Storytelling with Shadows in Marrakech:
Wandering through the bustling souks of Marrakech, the light was often dramatic – shafts of sunlight cutting through narrow alleys, creating intricate patterns of light and shadow. Instead of avoiding the shadows, I started embracing them. I framed shots so that a vibrant spice stall was bathed in light, while the surrounding alley was in deep shadow, drawing the eye directly to my subject. Or, I’d look for the geometric patterns created by the light filtering through a wooden lattice, making the shadows part of the composition. This added depth, mystery, and a true sense of place.
Actionable Tips for Light-Centric Composition:
- Frame with Light: Use doorways, windows, or even the edge of a light beam to frame your subject. This naturally draws the viewer's eye.
- Embrace Shadows (Creatively!): Shadows aren't always bad. Use them to create drama, depth, and mood. Look for interesting patterns they cast or use them to obscure distracting elements.
- Shoot Through Elements: Shooting through a windowpane (with reflections minimized), a sheer curtain, or even a glass of water can add a dreamy, ethereal quality, especially when back-lit.
- Look for Highlights: Identify the brightest parts of your scene and decide if they are distracting or enhancing. Sometimes, slightly underexposing your photo can preserve detail in highlights, and you can always brighten shadows in editing.
- The Rule of Thirds (with Light): Position your most interesting light sources or the most brightly lit parts of your scene along the intersecting lines or points of the rule of thirds grid for a balanced and engaging composition.
5. The Post-Processing Power-Up: Enhancing the Glow
Even with the best lighting techniques, post-processing is where you truly refine your indoor shots. Influencers don't just snap; they polish. This isn't about faking it; it's about making your photos look their absolute best, just as your eyes saw them.
My Rainy London Day Transformation:
I once took a photo inside the British Museum on a particularly gloomy, rainy London day. The light was flat and uninspiring. I almost deleted the shot. But later, playing around in Lightroom Mobile (the free version is incredible!), I subtly boosted the exposure, lifted the shadows, and added a touch of clarity. Crucially, I adjusted the white balance to a warmer tone, transforming the dull, cool light into something inviting and historic. The result was a photo that looked like it was taken on a bright, sunny day, even though it was pouring outside!
Actionable Tips for Post-Processing Brilliance:
- Brightness & Exposure: Your first stop. Don't be afraid to slightly increase exposure to compensate for dim indoor light.
- Highlights & Shadows: These are your best friends. Reduce highlights to recover detail in bright areas (like a window) and lift shadows to bring out details in darker areas without making the whole photo look flat.
- White Balance Adjustment: Indoor artificial light often casts an orange (tungsten) or green (fluorescent) tint. Use the white balance slider (or eyedropper tool if available) to neutralize these color casts and make whites truly white.
- Clarity & Dehaze: A slight boost in clarity can add sharpness and definition, especially in low-light shots. The "Dehaze" slider can help reduce any atmospheric haze, making colors pop.
- Selective Adjustments: Most editing apps (Lightroom Mobile, Snapseed) have a brush or radial/linear gradient tool. Use these to selectively brighten a face, darken a distracting background, or add a pop of contrast to a specific object.
- Favorite Apps:
- Lightroom Mobile (Free/Paid): Industry standard for a reason. Powerful, comprehensive, and syncs across devices.
- Snapseed (Free): Google's fantastic editing app. Intuitive, with great selective adjustment tools.
- VSCO (Free/Paid): Known for its beautiful film-like filters, but also has excellent manual controls.
The Final Glow: Practice, Experiment, and Share Your Masterpieces!
The beauty of these "secrets" is that they're accessible to everyone, regardless of your camera gear. Whether you're shooting on the latest iPhone, a mirrorless camera, or a trusty DSLR, understanding light is the single most important skill you can develop.
It's not about expensive equipment; it's about training your eye to see light, understanding how it behaves, and knowing how to manipulate it to tell your story. The more you practice, the more intuitive it becomes. You'll start walking into a room and instantly know where the best light is, how to use it, and what kind of shot it will create.
So, next time you're exploring a magnificent cathedral in Barcelona, enjoying a vibrant street food scene under a tent in Bangkok, or simply savoring a quiet moment in a boutique hotel in Lisbon, don't let challenging indoor light deter you. Arm yourself with these tricks, and watch your photos transform from flat and forgettable to truly stunning and share-worthy.
Now go forth, fellow travelers, and make your indoor shots glow! I can't wait to see what magic you create.
What are your go-to indoor lighting tricks? Share your tips and your most stunning indoor travel photos with us on Instagram using #TripsoraLights and tagging @TripsoraOfficial! Let's inspire each other!
---