The Secret Glow: How Locals Master Indoor Photography (And Why You're About to Join Them)
I remember it like it was yesterday: perched on a rickety stool in a tiny, impossibly charming izakaya in Kyoto. The air was thick with the scent of grilled yakitori, the gentle murmur of Japanese conversation, and the warm, inviting glow of paper lanterns. It was a scene straight out of a dream, a moment I desperately wanted to capture.
My phone came out. Click.
And... disappointment. The photo was a muddy mess. Blurry faces, blown-out lanterns, and a general sense of "meh" that utterly failed to convey the magic I was experiencing. I sighed, tucked my phone away, and resigned myself to merely remembering the moment.
Then, across the room, I saw her. A young Japanese woman, effortlessly snapping photos of her meal and friends with just her smartphone. Her shots, even from a distance, looked vibrant, sharp, and perfectly lit. No fancy gear, no elaborate setup. Just her, her phone, and an almost intuitive understanding of light.
It hit me then: locals, whether consciously or not, possess a unique understanding of their environment, including its light. They know the best time to visit that museum, the perfect table in that cafe, or the angle that makes a hidden alleyway pop. It’s not a conspiracy, but a learned intuition, a subtle mastery that often eludes the hurried tourist.
But what if you could tap into that intuition? What if you could learn the "lighting language" that transforms mundane indoor shots into gallery-worthy masterpieces? Well, my fellow wanderer, you’re in luck. After years of trial, error, and a healthy dose of observing those in the know, I’ve cracked the code. And today, I’m sharing the lighting tricks that will elevate your indoor travel photography from amateur to absolutely astonishing.
Get ready to bookmark this, because your Instagram feed is about to get a serious upgrade.
1. The Dance with Daylight: Befriending the Ambient Glow
Forget expensive studio lights; your best friend indoors is often free: natural light. The trick isn't just finding it, but understanding its nuances.
Think about that bustling artisanal market in Marrakech, the one with vibrant spices and intricate leather goods. Or that hushed, ancient library in Dublin, illuminated by tall, arched windows. These places aren't just beautiful; they're full of potential light sources.
The Golden Rule:
Always, always look for windows, doorways, or any opening to the outside. Natural light is soft, flattering, and creates a beautiful, authentic glow.
Actionable Tips:
- Position is Everything: When photographing a person or an object, try to place them near a window. Don't put the window behind them (unless you're going for a silhouette effect), as this will often underexpose your subject. Instead, position them so the light is hitting their face or the front of the object. Think of it as painting with light.
- The "Window Walk": Before you even take out your camera, do a quick scan of the room. Where is the light coming from? Is it direct and harsh (mid-day sun blasting through a window), or soft and diffused (overcast sky, or light filtering through sheer curtains)? Soft light is generally more forgiving and flattering.
- Embrace the Shadows (Wisely): Don't be afraid of shadows! They add depth and drama. Use them to define shapes and textures, especially in places like a dimly lit antique shop in Paris or a grand cathedral in Rome. Just make sure your main subject is still well-lit.
- Angle for Diffusion: If the light from a window is too harsh, try angling your subject slightly away from the direct beam, or use a natural diffuser like a sheer curtain if available. Sometimes, just moving a few inches can make all the difference.
Personal Anecdote: I was once trying to photograph a beautifully plated pastel de nata in a tiny bakery in Lisbon. The light inside was terrible. But then I noticed a small, open doorway leading to an inner courtyard. I gently moved my plate of pastries just inside that doorway, angling it so the soft, diffused light from the courtyard spilled over it. The result? A perfectly lit, mouth-watering shot that earned me dozens of compliments on Instagram. Cost: €1.20 for the pastry, zero for the light.
2. The Pocket Studio: Mastering Portable Reflectors (Yes, Even Your Napkin!)
This is where you start thinking like a local artisan, subtly manipulating light without drawing attention. You don't need a professional reflector kit; often, the best tools are already in your bag, or right in front of you.
The Concept:
A reflector bounces light back onto your subject, filling in shadows and adding a subtle lift. A diffuser softens light, spreading it out evenly.
Actionable Tips:
- The White Surface Trick: Eating at a restaurant? A white napkin, menu, or even a white plate can be a fantastic mini-reflector. Position it opposite your main light source (e.g., a window) to bounce light back onto your food or companion. This is especially useful for close-up shots of details or food.
- Your Phone Screen as a Fill Light: In a pinch, if one side of your subject is too dark, turn your phone screen to its brightest white setting and use it to gently illuminate the shadowy side. Hold it a few inches away and angle it carefully. It's surprisingly effective for small details or portraits in very dim settings, like a cozy pub in Dublin's Temple Bar district.
- DIY Diffusers: If the natural light is too harsh (e.g., direct sunlight streaming through a window), a thin piece of white paper, a translucent plastic bag, or even a very sheer scarf can act as a makeshift diffuser, softening the light before it hits your subject. Hold it between the light source and your subject.
- The Travel Reflector (Budget Buy): For those who want to get a little more serious, a small, collapsible 5-in-1 reflector kit (usually 12-24 inches) costs around $15-25 on Amazon. They fold down to a tiny disc and are incredibly versatile, offering white, silver, gold, black, and translucent options. The white and silver sides are your best friends for indoor shots.
Personal Anecdote: I was visiting a small, family-run pottery workshop in Oaxaca, Mexico. The artisan's intricate work was stunning, but the shop was quite dark. I pulled out my small, collapsible reflector and, with the artisan's permission, held the white side just out of frame, bouncing the faint light from the doorway onto his hands as he worked. The details of the clay and his weathered hands came alive in the photos, capturing the essence of his craft in a way that would have been impossible without that tiny piece of gear. He even seemed impressed!
3. Befriending the Unsung Hero: Clever Artificial Light Sources
Sometimes, natural light simply isn't an option. That’s when you need to get creative with existing artificial light, or even bring your own discrete, portable solutions. The key is never to use your camera's built-in flash directly, especially indoors – it creates harsh shadows, washes out colors, and screams "tourist!"
Actionable Tips:
- The "Lamp Whisperer": Look for existing lamps – table lamps, floor lamps, even decorative string lights in a cafe. These can be incredible light sources. Position your subject so the lamp is illuminating them from the side or slightly above. If the light is too harsh, try moving the lamp slightly further away, or even bouncing its light off a nearby white wall or ceiling.
- Pro Tip: For a warmer, more inviting glow, look for lamps with incandescent or "warm white" LED bulbs.
- Bounce the Flash (If You Must): If you absolutely must use a flash (and you have an external one, not your phone's built-in), point it at a white ceiling or wall behind you. The light will bounce off the surface, creating a much softer, more diffused illumination than direct flash. This is tricky with a phone, so generally avoid phone flash unless it's for a very specific, stylistic effect.
- Your Phone's Flashlight (The Secret Weapon): Yes, your phone's flashlight can be a lifesaver, but don't point it directly at your subject. Instead, use it as a fill light by bouncing it off a nearby white surface (a wall, a menu, a friend's white shirt) to gently illuminate shadows. Or, if you have a second phone, have a friend hold it slightly off-camera, angled to provide a subtle side light. This works wonders for food photography in a dimly lit restaurant or for adding sparkle to an object in a dark museum.
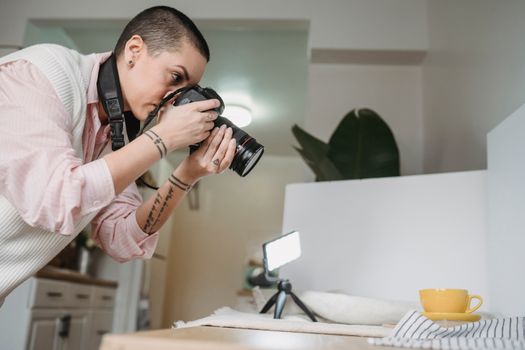
- Mini LED Panels (The Stealthy Upgrade): For around $20-40, you can get a credit-card-sized LED panel that offers adjustable brightness and color temperature. These are incredibly portable and powerful. Use them off-camera, again, either direct but angled, or bounced off a surface for soft, directional light. They're perfect for illuminating intricate details in a gallery or adding a professional touch to a portrait in a boutique hotel room.
Personal Anecdote: I was exploring a hidden art gallery in Berlin, tucked away in an old factory building. The industrial space was atmospheric but incredibly dark, making it impossible to capture the vibrant street art on display. I discretely pulled out my tiny LED panel, set it to a warm white, and positioned it on a nearby crate, angled to illuminate a particularly stunning mural. The photos were crisp, colorful, and captured the raw energy of the art, all thanks to a light source smaller than my hand. Other tourists were struggling with blurry, dark shots, while mine looked like they were taken in a professional studio.
4. Composition & Angles: How Light Interacts with Your Viewpoint
Lighting isn't just about brightness; it's about how light sculpts your subject. The angle from which light hits your subject, combined with your camera's angle, can dramatically alter the mood and impact of your photo. This is where the "local's eye" truly comes into play – they instinctively know the best vantage points.
Actionable Tips:
- Side Lighting for Drama: Light hitting your subject from the side creates beautiful shadows and highlights, emphasizing texture and depth. This is fantastic for architectural details in a cathedral, the folds of fabric in a market stall, or the contours of a face. Try different angles – a slight turn of your body or subject can transform a flat image into a dynamic one.
- Backlighting for Mood: While generally avoided for direct subjects, backlighting (light coming from behind your subject) can create stunning silhouettes or a beautiful "halo" effect around the edges of your subject. This works well for capturing the atmosphere of a busy cafe with light streaming through the front windows, or a person standing in a doorway.
- High Angles for Evenness: Sometimes, shooting from a slightly higher angle can help capture more ambient light, especially in spaces with overhead lighting. This is often good for wider shots of rooms or tablescapes.
- Leading Lines & Light: Use natural leading lines (like a hallway, a row of archways, or a path of light) to draw the viewer's eye towards your subject. Light can highlight these lines, making them even more effective. Imagine a beam of light cutting across a dark, old stone floor in an ancient castle – follow that light!
- Look for Reflections: Glass, polished wood, water, or even shiny metal can reflect light in interesting ways. Use these reflections to add sparkle, create abstract patterns, or subtly illuminate parts of your scene. Just be mindful of unwanted glare.
Personal Anecdote: In the magnificent Sagrada Familia in Barcelona, the stained glass windows cast incredible, shifting patterns of colored light across the interior. Most tourists were just snapping wide shots. But I noticed a local photographer patiently waiting for a specific moment. I mimicked her. I positioned myself to capture a pillar where the red and blue light converged perfectly, and then waited until a tourist walked into that patch of light. The resulting photo, with the person silhouetted against the vibrant colors, was pure magic – a testament to patience and understanding how light interacts with structure.
5. Post-Processing Power-Up: The Final Polish
Even with the best lighting tricks, indoor photos often need a little digital love. This isn't about faking it; it's about enhancing what's already there and correcting minor imperfections. Think of it as developing a film negative – it’s part of the process.
Essential Mobile Apps:
Lightroom Mobile (free version is robust), Snapseed (free), VSCO (free with in-app purchases).
Actionable Tips:
- White Balance is Key: Indoor lighting can often have a color cast (too yellow from incandescent bulbs, too blue from fluorescent). Adjusting the white balance is crucial for making colors look natural. Most apps have an "auto" or "eyedropper" tool, or you can manually slide the temperature and tint until skin tones and whites look correct. This is often the single most important adjustment for indoor shots.
- Exposure & Contrast: Gently boost exposure if the photo is too dark, but be careful not to blow out highlights (overly bright areas). Increase contrast to add punch, and use the "highlights" and "shadows" sliders to recover detail in the brightest and darkest parts of your image.
- Clarity & Sharpness: A slight boost in clarity can make textures pop without looking over-processed. Add a touch of sharpness to combat any slight blur from low light. But remember: less is often more here.
- Noise Reduction: Low-light indoor photos often suffer from "noise" (grainy specks). Most apps have a noise reduction slider. Use it sparingly, as too much can make your photo look plasticky.
- Selective Adjustments: Tools like Snapseed's "Selective" adjustment allow you to brighten or darken specific areas of your photo without affecting the whole image. This is incredibly powerful for drawing attention to your subject or fixing uneven lighting.
Personal Anecdote: I'd spent an hour trying to photograph the incredibly intricate details of a painted ceiling in a historic palazzo in Florence. Despite my best efforts with ambient light, the colors still looked a bit muted, and there was some distracting shadow. Back at my Airbnb, I opened the photo in Lightroom Mobile. A quick adjustment to white balance brought out the true hues, a slight boost in shadows revealed hidden details, and a gentle touch of clarity made the brushstrokes pop. What looked like a decent photo on my camera became a truly stunning piece of art on my phone, ready for sharing. It’s like magic, I tell you!
6. The Mindset: Observe, Adapt, and Be Patient
Ultimately, the biggest "secret" locals possess isn't a piece of gear or a complex technique, but a mindset: they are observers. They know their spaces, they understand the rhythm of the light throughout the day, and they are patient.
Actionable Tips:
- Scout Your Location: If possible, visit a location (like a museum or cafe) at different times of day to see how the light changes. That cozy bookstore might be best in the morning when sunlight streams through the front window, or in the late afternoon when the lamps cast a warm, inviting glow.
- Learn from the Locals: Watch how locals interact with light. Do they naturally gravitate towards a certain spot for their selfies? Do they wait for a cloud to pass before snapping a photo? There's a lot to learn from subtle observation.
- Patience Pays Off: Sometimes, the perfect light is fleeting. A cloud might pass, a person might move, or a beam of light might shift. Don't rush. Wait for that optimal moment.
- Embrace Imperfection (Sometimes): Not every shot needs to be studio-perfect. Sometimes, the soft blur or the dramatic shadow contributes to the authenticity and mood of the travel experience. It’s about telling a story.
Personal Anecdote: I was exploring the souks of Fes, Morocco. The labyrinthine alleyways were a photographer's dream, but also a nightmare for light. It was dark, chaotic, and challenging. I noticed a local merchant, sipping mint tea, watching the occasional shafts of sunlight pierce through the canvas awnings above. He wasn't taking photos, but he was aware of the light. When a particularly strong beam illuminated a display of vibrant leather slippers, I knew it was my moment. I quickly composed, snapped a few shots, and within seconds, the light had shifted. That local's silent observation taught me more than any photography lesson.
Your Journey to Luminous Indoor Shots Begins Now!
You now hold the keys to transforming your indoor travel photography. No more blurry, dark, or lifeless photos. With these tricks, you’ll start seeing light in a whole new way, capturing the true essence and magic of every unique indoor space you encounter. From the grandeur of a European cathedral to the intimacy of a hidden ramen bar, your photos will tell a richer, more vibrant story.
So, next time you step into a dimly lit cafe, a bustling market, or a quiet museum, don't despair. Look for the light, use your "pocket studio," be clever with artificial sources, compose with intention, and give your photos that final polish.
Go forth, explore, and illuminate your memories!
What's your biggest indoor photography challenge? Share your thoughts and favorite lighting hacks in the comments below! And don't forget to share your newly lit masterpieces on Instagram with #TripsoraLights!
---