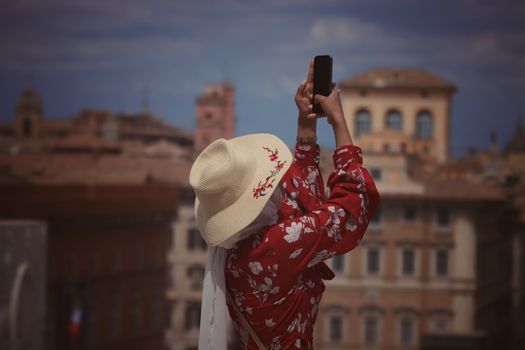
How to Take Amazing Photos of Yourself You Need to Experience Before You Die
There’s a photo I have from my first solo trip to Rome. I’m standing in front of the Colosseum, squinting into the sun, holding my point-and-shoot camera at arm’s length, and looking… well, a little lost. My hair is a mess, the composition is terrible, and you can barely tell it’s me, let alone the iconic landmark behind me. It’s a classic, cringe-worthy early travel selfie.
Fast forward a few years, and there’s another photo. I’m perched on a cliff edge in the Faroe Islands, a tiny figure dwarfed by the dramatic, mist-shrouded landscape, looking out over the crashing waves. The light is perfect, the composition tells a story of awe and solitude, and though you can't see my face clearly, you feel the moment. That photo isn't just a picture; it's a feeling, a memory, a testament to a journey.
The difference between these two photos isn't just better gear or a prettier location. It's a fundamental shift in mindset and a whole lot of learned techniques. For years, I struggled with the "how do I get myself in the shot when I'm traveling alone?" dilemma. I didn't want to bother strangers constantly, and let's be honest, not everyone has an eye for your perfect shot. I wanted to capture my experience, authentically, beautifully, and without relying on anyone else.
And that's what this guide is all about. This isn't just about taking "selfies" in the casual sense. This is about crafting amazing photos of yourself that are so epic, so evocative, and so uniquely you, that they become cherished memories, powerful stories, and perhaps, even a little bit of a legend. These are the self-portraits you need to experience creating before you die, photos that truly reflect the magic of your adventures.
Ready to level up your travel photography game and capture those iconic "I was here!" moments? Let's dive in.
---
From Tourist Snap to Travel Epic: Redefining Your Self-Portraits
Before we even talk about cameras or tripods, let's talk mindset. The biggest leap in my self-portrait journey came when I stopped thinking of it as "taking a picture of myself" and started thinking of it as "capturing me within the story of this place."
1. Embrace the Narrative:
Every great photo tells a story. What story do you want to tell? Are you an intrepid explorer, a serene wanderer, a joyful adventurer? Your pose, your interaction with the environment, and even your clothing can contribute to this narrative. Don't just stand and smile. Look out, walk away, jump, laugh, interact with a local element (like a market stall or a boat).
2. Pre-Visualize Your Shot:
Before you even set up your camera, take a moment to look around. Where's the best light? What are the interesting lines or frames? What's the most compelling angle? Imagine the final shot in your head. I often scroll through Instagram for inspiration, saving shots I love and then thinking, "How can I adapt this to my style and this location?"
3. Composition is Key, Even for You:
The same rules of photography apply.
* Rule of Thirds: Position yourself off-center for a more dynamic image.
* Leading Lines: Use roads, rivers, architectural elements to draw the viewer's eye towards you.
* Framing: Use natural frames like archways, trees, or windows to create depth.
* Negative Space: Don't be afraid to be a small element in a vast landscape. It emphasizes the grandeur of your surroundings.
4. Interact with Your Environment:
Don't just be in the photo; be part of it. Are you hiking? Show yourself mid-stride. Are you at a beach? Dip your toes in the water. Are you in a bustling market? Look at the goods, engage with the scene. These actions make your photos feel authentic and alive.
Personal Anecdote: I remember being at the stunning cliffs of Étretat in Normandy, France. Instead of just facing the camera, I set up my tripod further back and walked along the path, looking out at the iconic arches. The resulting photo showed me as a small figure, lost in the beauty, rather than just posing. It felt more genuine, more me.
---
Your Photo Arsenal: Tools for Solo Shot Success
You don't need a professional camera crew to get professional-looking self-portraits. Modern technology has made it incredibly accessible. Here’s what you need in your solo travel photography kit:
1. The Mighty Smartphone:
* Your Best Camera: Seriously, modern smartphones (iPhone 13/14/15, Samsung Galaxy S23/S24, Google Pixel 7/8) have incredible cameras. Learn to use its features: Portrait Mode for beautiful bokeh, Wide-Angle lenses for expansive landscapes, and manual controls for adjusting exposure and focus.
* Apps for Control: Apps like Halide Mark II (iOS) or ProShot (Android) give you DSLR-like control over your phone camera.
2. The Indispensable Tripod:
* Lightweight Travel Tripod: This is non-negotiable. It frees your hands and ensures stability. Look for something compact and sturdy. Brands like Manfrotto (BeFree series) or Peak Design (Travel Tripod) are excellent, though a bit pricier. For budget-friendly options, Amazon has many reliable choices around $50-100.
* GorillaPod/Flexible Tripod: For uneven surfaces, attaching to railings, or getting low angles, a Joby GorillaPod (around $30-70 depending on size) is a game-changer. I always carry one for my phone and a small one for my mirrorless camera.
3. Remote Control Magic:
* Bluetooth Remote Shutter: This tiny device (often under $10-15 on Amazon) connects to your phone or camera and lets you trigger the shutter from a distance. It's the secret weapon for natural-looking shots without sprinting back and forth to your camera's timer.
* Camera's Built-in Wi-Fi/App: Most modern cameras have companion apps that let you control settings, see a live view, and trigger the shutter from your phone. This is fantastic for precise framing.
4. Action Cameras (GoPro, DJI Osmo Action):
* For the Adventurous: If you're into surfing, diving, hiking, or anything high-octane, an action camera is perfect. Their wide-angle lenses capture immense scenes, they're durable, and waterproof. They often have voice control ("GoPro, take a photo!") which is incredibly useful when your hands are full.
* Mounts: Invest in various mounts – chest mounts, head mounts, wrist mounts – to capture unique perspectives of yourself in action.
5. Drones (for the Pros):
* Ultimate Perspective: For truly epic, cinematic shots that place you in a vast landscape, a drone (like DJI Mini 3 Pro or Mavic Air 2S) is unparalleled. However, be aware of local regulations, privacy concerns, and practice flying. This is an advanced tool and not always feasible for every trip.
Personal Anecdote: My first Bluetooth remote shutter changed everything. I was in Santorini, Greece, trying to get a shot with the famous white buildings and blue domes. Before, I'd set a 10-second timer, sprint into position, and often miss the shot or look awkward. With the remote, I could take dozens of photos, adjust my pose subtly, and capture the perfect light without breaking a sweat. It felt like I had a personal photographer!
---
Crafting the Frame: Light, Lines, and Lived Experiences
Photography is fundamentally about light and composition. Mastering these elements will elevate your self-portraits from good to absolutely breathtaking.
1. The Golden Hour & Blue Hour are Your Best Friends:
* Golden Hour: The hour after sunrise and the hour before sunset. The light is soft, warm, and creates beautiful long shadows and a flattering glow on skin. This is prime time for those dreamy, atmospheric shots.
* Blue Hour: The period just after sunset or just before sunrise, when the sky deepens into a rich, luminous blue. Perfect for cityscapes with twinkling lights, or moody, dramatic landscapes.
* Avoid Harsh Midday Sun: Unless you're going for a specific high-contrast look, the midday sun creates harsh shadows and often makes people squint. If you must shoot then, seek shade or use a diffuser.
2. Embrace Dynamic Composition:
* Leading Lines: Look for natural lines in the environment (roads, fences, rivers, architectural patterns) that draw the viewer's eye into the photo and towards you.
* Rule of Thirds: Imagine your frame divided into a 3x3 grid. Place yourself (or key elements) along these lines or at their intersections for a more balanced and engaging image.
* Symmetry and Patterns: Some locations lend themselves beautifully to symmetry (e.g., grand architecture, reflections). Use these to create striking compositions.
* Perspective Play: Don't always shoot at eye level. Get down low for a dramatic, expansive sky, or find a higher vantage point to show yourself against a sweeping landscape.
3. Movement and Emotion Tell the Story:
* Don't Just Pose: Engage with the scene. Walk, run, jump, twirl, look away thoughtfully, laugh, or interact with a prop (like holding a coffee cup, reading a map). These actions add dynamism and authenticity.
* Convey Emotion: Are you feeling awe, joy, contemplation, adventure? Let that show in your body language. A simple gaze into the distance can be far more powerful than a forced smile.
* Candid Moments: Use your remote shutter to take multiple shots rapidly. You'll be surprised how often the "in-between" shots, where you're adjusting or moving, turn out to be the most natural and captivating.
Personal Anecdote: I was in Cappadocia, Turkey, for sunrise, hoping to get a shot with the hot air balloons. The light was changing rapidly, and I had limited time. Instead of just standing, I set my camera on my tripod, started a continuous burst with my remote, and simply walked slowly, turning my head to watch the balloons. One of those candid, walking shots, with the golden light illuminating the balloons and the unique rock formations, became one of my all-time favorite travel self-portraits. It felt less posed, more like a moment truly lived.
---
Bucket List Backdrops: Epic Self-Portraits Around the World
Now for the fun part: where to go to capture those truly iconic, "before you die" self-portraits! These are just a few ideas; the world is your canvas.
1. The Serene & Majestic: Lago di Braies, Dolomites, Italy
* The Shot: Rowing a classic wooden boat across the emerald green lake, surrounded by towering peaks.
* Details: Arrive at sunrise (around 5-6 AM in summer) to avoid crowds and get the best light. Boat rentals start around 10 AM and cost about €19-€25 for an hour. You'll need to set up your tripod on the shore and use a remote. The reflections are incredible in the early morning stillness.
* Vibe: Tranquil, ethereal, postcard-perfect.
2. The Adventurous & Dramatic: Skógafoss Waterfall, Iceland
* The Shot: A tiny figure dwarfed by the immense power of the waterfall, perhaps with a rainbow arching overhead. Or hiking up the adjacent stairs for a unique perspective.
* Details: Iceland is a self-portrait paradise. Skógafoss is easily accessible off the Ring Road. Set up your tripod at a distance to capture the scale. Be prepared for spray and bring a waterproof camera/phone case. The best light is often late afternoon.
* Vibe: Raw, powerful, awe-inspiring.
3. The Urban & Iconic: Eiffel Tower from Trocadéro, Paris, France
* The Shot: You, elegantly posed or walking, with the sparkling Eiffel Tower as your backdrop, especially at night when it twinkles on the hour.
* Details: This spot is always crowded. Your best bet is sunrise (yes, really!) for fewer people and beautiful soft light. For the twinkling lights, you'll need a very sturdy tripod and a remote/timer to capture the long exposure without blur. Be mindful of your surroundings and belongings.
* Vibe: Romantic, chic, timeless.
4. The Spiritual & Ethereal: Gates of Heaven at Lempuyang Temple, Bali, Indonesia
* The Shot: Standing between the iconic split gates, with Mount Agung perfectly framed in the distance (often with a "reflection" created by a mirror trick from local guides).
* Details: This spot is extremely popular. You'll likely queue for hours. Go early (6 AM) for the best chance at a clearer shot and to avoid the harshest sun. There's usually a small entrance fee (around IDR 50,000). The "reflection" is a clever trick using a small mirror under the lens, often done by local vendors for a small tip.
* Vibe: Mystical, serene, reflective.
5. The Grand & Ancient: Petra, Jordan
* The Shot: Standing in front of the Treasury (Al-Khazneh) from the famous viewpoint above, or walking through the Siq, a tiny figure amidst towering sandstone walls.
* Details: Get there at opening (6 AM) to experience the Siq and Treasury with minimal crowds. For the iconic high viewpoint, you can hire a local Bedouin guide (negotiate price, usually 5-10 JOD) to take you up a short, steep path. The light on the Treasury is best in the morning.
* Vibe: Historic, epic, adventurous.
6. The Wild & Free: The Namib Desert, Namibia
* The Shot: A solitary figure on a towering red dune (like Dune 45 or Big Daddy), with endless rippling sandscapes stretching to the horizon.
* Details: Requires a 4x4 vehicle to access Sossusvlei. The best time is sunrise or sunset for incredible colors and cooler temperatures. Climb a dune and use a wide-angle lens on your camera/phone to capture the vastness.
* Vibe: Solitary, immense, awe-inspiring.
Personal Anecdote: Climbing Dune 45 in Namibia at sunrise was exhausting but utterly magical. I set up my camera at the base, then climbed about halfway up, turned around, and used my remote to capture myself against the impossibly red sand and deep blue sky. It was a moment of profound solitude and beauty, perfectly encapsulated in that frame. The feeling of the sand between my toes, the vast silence, and the knowledge that I captured that moment, was unforgettable.
---
From Raw to Remarkable: Polishing Your Travel Self-Portraits
Taking the photo is only half the battle. Post-production is where you truly bring your vision to life and give your images that professional, shareable polish.
1. Mobile Editing Apps – Your Pocket Studio:
* Lightroom Mobile (Free & Paid): My go-to. It offers powerful tools for color correction, exposure adjustments, selective edits, and the ability to sync presets.
* Snapseed (Free): Excellent for quick, intuitive edits, with great tools for selective adjustments, healing (removing small distractions), and perspective correction.
* VSCO (Free & Paid): Known for its beautiful film-like filters (presets) that give a consistent aesthetic.
* Facetune (Paid): Use sparingly and subtly for minor skin smoothing or removing tiny blemishes, but avoid over-editing. Authenticity is key!
2. Essential Editing Steps:
* Crop & Straighten: Always start here. Ensure horizons are level and crop for stronger composition.
* Exposure & Contrast: Adjust brightness and dynamic range. Don't be afraid to pull down highlights and lift shadows to recover detail.
* White Balance & Color: Adjust temperature (warm/cool) and tint (green/magenta) to correct color casts. Boost vibrancy or saturation slightly for more pop, but avoid oversaturation.
* Sharpening & Clarity: Add a touch of sharpness to make details pop, and clarity to enhance mid-tone contrast (use sparingly).
* Noise Reduction: If shooting in low light, reduce noise for a cleaner image.
* Spot Removal/Healing: Use this to remove distracting elements like a rogue tourist, a power line, or a bit of litter.
3. Develop Your Style & Use Presets Wisely:
* Consistency is Key: For an appealing Instagram feed, aim for a consistent editing style. This means using similar color grading, contrast levels, and overall mood across your photos.
* Presets (Filters): Presets are a fantastic starting point, saving you time. Many photographers sell their custom presets (you can find mine on my website!), or you can create your own in Lightroom. Apply a preset, then fine-tune it for each individual photo. Don't just slap a filter on and call it a day!
Personal Anecdote: I once took a stunning photo of myself looking out over a misty valley in Scotland. The light was good, but the colors were a bit flat due to the mist. A few minutes in Lightroom Mobile, adjusting the white balance to warm it slightly, boosting the shadows to reveal more detail in the hills, and adding a touch of clarity, transformed it from a nice photo into an absolutely breathtaking, atmospheric masterpiece. It truly brought out the mood I felt in that moment.
---
Your Story, Your Legacy: Go Out and Capture It!
Taking amazing photos of yourself isn't about vanity; it's about empowerment. It's about capturing your unique journey, your courage to explore, and your connection to the incredible world around you. These self-portraits become more than just images; they are tangible memories, stories you'll tell for a lifetime, and a testament to the person you became through travel.
Don't be afraid to look a little silly setting up your tripod or posing in front of strangers. Most people are either oblivious or impressed! Embrace the process, experiment with angles, light, and movement, and be patient. Sometimes, the perfect shot takes a few tries, or even a few visits.
So, pack your bags, charge your batteries, and go out there. Find that breathtaking backdrop, feel the moment, and capture a piece of your soul within it. These are the photos that will make you smile years from now, reminding you of the incredible experiences you had and the amazing person you were (and still are) out exploring the world.
What's the dream self-portrait you want to capture before you die? Where in the world do you envision yourself? Share your travel dreams and photo goals in the comments below! And when you capture that epic shot, don't forget to tag us #TripsoraSelfieGoals so we can celebrate your incredible journey. Bookmark this guide, grab your gear, and start creating your photographic legacy!
---