Master Food Photography: My Pro Tips That Changed My Travel Life Forever!
I used to be that person. The one who'd order an exquisitely plated dish in a Michelin-starred restaurant in Paris, pull out my phone, snap a quick, blurry picture, and then wonder why it looked nothing like the magazine spreads. My early travel food photos were, to put it mildly, tragic. That incredible Pad Thai in Bangkok looked like a greasy, indistinct blob. The vibrant gelato in Rome? A sad, muted scoop. My Instagram feed was a graveyard of culinary disappointments, not because the food wasn't amazing, but because I couldn't capture its soul.
For years, I believed I just didn't have "the eye." I'd scroll through Tripsora, admiring the stunning, vibrant food shots from other travel bloggers – each dish a work of art, each photo a story in itself – and sigh, convinced I'd never reach that level. But then, something shifted. A particularly unappetizing photo of a glorious seafood paella in Barcelona (which tasted divine, by the way!) was my breaking point. I decided right then and there: enough was enough. I was going to learn how to photograph food like a pro, or die trying (of hunger, probably, from staring at my food too long).
What followed was a journey of discovery, experimentation, and countless (initially terrible) photos. I devoured tutorials, observed professional photographers, and practiced relentlessly in bustling markets, cozy cafes, and Michelin-starred marvels across the globe. And what I learned not only transformed my travel photography but genuinely changed how I experience and remember my journeys. This isn't just about pretty pictures; it's about telling a story, reliving a moment, and making your followers drool with every scroll.
Today, I’m thrilled to share the game-changing tips that took my food photography from zero to hero. If you're ready to make your culinary captures as memorable as the meals themselves, keep reading. This guide is for you.
1. It All Starts with Light (And Not the Flashy Kind!)
This is, without a doubt, the single most important lesson I learned. Good light doesn't just make your food look better; it makes it look edible. And the best light? Natural light. Always.
My "Aha!" Moment in Rome:
I remember sitting in a charming, dimly lit trattoria in Rome, trying desperately to capture my Cacio e Pepe. The artificial overhead lighting cast harsh, yellow shadows, making the creamy pasta look flat and unappetizing. Frustrated, I glanced around and noticed a small table by a window, bathed in soft, golden hour light filtering through sheer curtains. Moving there was my first real "aha!" moment. The transformation was instant and dramatic. The pasta suddenly had texture, the cheese glistened, and the pepper popped. It was like magic!
Practical Tips for Mastering Light:
- Seek Window Light: This is your best friend. Position your food near a window, ideally one that isn't receiving direct, harsh sunlight. Overcast days are actually fantastic for food photography because the clouds act as a giant natural diffuser, providing soft, even light.
- Diffuse, Diffuse, Diffuse: Direct sunlight creates harsh shadows and blown-out highlights. If the sun is too strong, use a sheer curtain, a translucent white plastic bag, or even a thin white menu as a makeshift diffuser between the light source and your food. This softens the light, creating gentle shadows and a more appealing look.
- Say NO to Flash: I cannot stress this enough. Your phone's built-in flash is the enemy of delicious-looking food. It flattens the image, creates harsh glare, and often casts an unnatural, sickly yellow hue. Just don't. Ever.
- Use a Reflector: Sometimes, one side of your dish might be in shadow. To brighten it up, use a white napkin, a piece of white paper, or even a white wall opposite your light source. This reflects light back onto your food, filling in those dark areas and creating a more balanced, appetizing shot. I often carry a small, foldable white card in my bag for this exact purpose – a simple hack that makes a huge difference!
- Mind the Overhead Lights: Most restaurants have overhead lighting that casts unflattering shadows. Try to position your dish so that the main light source (the window) is to the side or slightly behind your food. This creates beautiful backlighting or side-lighting that highlights textures and adds depth.
2. Composition is Your Secret Sauce (Beyond Just Point & Shoot)
Once you've got your lighting sorted, it's time to think about how you frame your delicious subject. Composition is about arranging elements within your shot to create a pleasing and engaging image. It’s what separates a snapshot from a photograph.
My Banh Mi Breakthrough in Hoi An:
I was in Hoi An, Vietnam, at a bustling street food stall, attempting to capture the legendary Banh Mi. My first few shots were straight-on, uninspired, and frankly, a bit boring. The sandwich looked flat, and the vibrant fillings were lost. I remembered seeing other bloggers using different angles. I tried an overhead shot, then a 45-degree angle, and then I noticed the beautiful, slightly worn patterned tablecloth. By using the lines of the tablecloth to lead the eye towards the Banh Mi, and framing it slightly off-center, the whole image came alive. It wasn't just a sandwich anymore; it was a story of a delicious moment in a vibrant place.
Practical Tips for Dynamic Composition:
- The Rule of Thirds: Imagine your frame divided into a tic-tac-toe grid. Place your main subject (or key elements) along these lines or at their intersections, rather than dead center. This creates a more dynamic and interesting image.
- Experiment with Angles: Don't just stick to one!
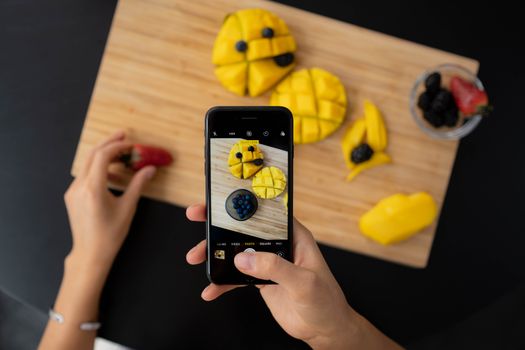
- Flat Lay (Overhead): My absolute go-to for breakfast spreads, vibrant market finds (like the spices in Marrakech or fresh produce in Oaxaca), pizzas, or anything with an interesting top. It's fantastic for showing multiple elements in a scene. Get directly above your dish, parallel to the table.
- 45-Degree Angle (Eye-Level): This is the most natural and versatile angle. It's great for showing the depth of a bowl of ramen, a plate of pasta, or a burger. It's often how you'd see the food if you were about to eat it. Perfect for capturing that bubbling pasta in Florence or a hearty stew in Lisbon.
- Straight-On (90-Degree): Best for showing off height and layers, like a towering burger, a slice of cake, or a stack of pancakes. It puts the viewer directly in front of the food, emphasizing its structure.
- Leading Lines: Use elements within your scene (cutlery, tablecloth patterns, the edge of a table) to draw the viewer's eye towards your main subject.
- Negative Space: Don't be afraid of empty space! It can help your subject stand out and give the photo a clean, minimalist feel. Think of a single, beautifully plated dessert on a large, plain table.
- Depth of Field: If your phone allows (many modern phones have "Portrait" mode), use a shallow depth of field to blur the background, making your food pop. This works wonders for isolating your dish from a busy restaurant background.
3. Styling Your Edible Masterpiece (Because We Eat with Our Eyes First)
You've got the light, you've got the angle – now, let's make that food look utterly irresistible. Food styling isn't about fakery; it's about presenting your dish in its most appealing form.
My Gelato Lesson in Florence:
I was in Florence, holding a perfect scoop of pistachio gelato, but my photos just weren't doing it justice. It looked a bit… lonely. Then I watched a local artist sketching nearby, adding a few simple lines to make his drawing pop. That’s when it hit me: I needed to add a few simple elements to my photo. I placed the cone on a beautiful rustic wooden bench, blurred the bustling Piazza della Signoria in the background, and added a small, clean napkin beneath it. Suddenly, it was more than just gelato; it was an Italian moment.
Practical Tips for Irresistible Styling:
- Keep it Simple, Don't Clutter: The food should be the star. Don't overwhelm the frame with too many props. A few well-chosen elements are far more effective than a chaotic mess.
- Props are Your Friends (Used Sparingly):
- Cutlery: A simple, clean fork or spoon can add context and scale. Avoid shiny, reflective cutlery if it creates distracting glares.
- Napkins/Placemats: These add texture, color, and define the space around your food. Linen napkins, rustic placemats, or even a simple tea towel can elevate a shot.
- Hands: Adding a hand (yours or a travel companion's) holding a fork, lifting a bite, or simply resting near the plate adds a human element, scale, and warmth. My favorite trick for showing off a fresh croissant from a Parisian bakery!
- Background Elements: A blurred coffee cup, a menu, a local newspaper, or even a glimpse of the restaurant's interior can add atmosphere without distracting from the main dish.
- Garnish is Gold: Fresh herbs (parsley, cilantro, mint), citrus wedges, a sprinkle of chili flakes, a drizzle of olive oil, or a dusting of powdered sugar can instantly brighten and add visual appeal to a dish. Always ask for a fresh garnish if it's not already present!
- Embrace the "Action Shot": This is where you bring your food to life!
- The Pour: Capturing a stream of coffee, syrup, or sauce adds dynamic movement.
- The Sprinkle: A dusting of powdered sugar or herbs mid-air.
- The Lift: Someone lifting a piece of pizza, a forkful of pasta, or a delicious dumpling. Capturing the steam rising from a bowl of Pho in Hanoi – pure magic!
- The Bite: A perfectly imperfect bite taken out of a pastry or burger adds authenticity and makes the viewer crave it even more.
- Cleanliness is Key: Wipe away any drips, crumbs, or smudges on the plate or table. A clean presentation makes a huge difference.
4. The Magic of Post-Processing (Where Good Photos Become Great)
Even with perfect light and composition, your photos will often benefit from a little polish. Post-processing isn't about transforming a bad photo into a good one; it's about enhancing a good photo to make it truly spectacular. And you don't need expensive software or a photography degree!
My Matcha-tastic Moment in Kyoto:
After a long day exploring the vibrant markets of Kyoto, I snapped a photo of my beautiful matcha latte. It looked okay, but a bit flat and dull, lacking the rich green vibrancy I remembered. Back at my ryokan, I pulled it up in Lightroom Mobile. A few quick tweaks – adjusting the white balance to remove a slight yellow cast, boosting the shadows to bring out the detail in the foam, increasing the clarity, and a subtle bump in saturation – transformed it from "meh" to "matcha-tastic"! The colors popped, the texture was visible, and it looked exactly how I remembered that delicious moment.
Practical Tips for Post-Processing Like a Pro (on Your Phone!):
- Essential Mobile Apps:
- Lightroom Mobile (Free Version): My absolute favorite. It offers incredible control over exposure, colors, and detail. You can sync presets and work like a pro.
- Snapseed: A powerful, free Google app with a wide range of intuitive tools for selective adjustments, healing, and dramatic effects.
- VSCO: Great for beautiful filters (presets) that give your photos a consistent, artistic look.
- Master These Key Adjustments:
- Exposure: The first thing to adjust. Brighten (increase exposure) if your photo is too dark, or darken if it's overexposed.
- Contrast: Makes the light parts lighter and the dark parts darker, adding "pop" and dimension. Use sparingly to avoid an unnatural look.
- Highlights & Shadows: These are crucial for food. Recover detail in blown-out bright areas (highlights) or bring out detail in dark areas (shadows).
- White Balance: This corrects the color temperature. If your photo looks too yellow (from warm indoor lights) or too blue (from cool outdoor light), adjust the white balance to make whites truly white. This is CRITICAL for making food look appetizing and true-to-color.
- Saturation & Vibrance: Saturation boosts all colors equally. Vibrance is smarter, boosting muted colors more than already vibrant ones. Use these to make your food's colors sing, but don't overdo it – you want natural, not cartoonish.
- Sharpness/Clarity: A subtle increase can bring out texture and detail, making your food look crispier and more defined.
- Crop & Straighten: Always ensure your horizons are straight and crop out any distracting elements.
- Develop a Consistent Style: As you edit more, you'll find a style you love. Using similar adjustments or presets across your photos creates a cohesive and professional-looking feed.
- Less is More: The goal is to enhance, not to drastically alter reality. Aim for subtle, impactful adjustments that make your food look its absolute best, not unrecognizable.
5. Practice, Patience, and the Pursuit of Deliciousness (Your Journey, Not Just a Destination)
Learning to photograph food like a pro isn't a one-and-done lesson; it's an ongoing journey. It takes practice, patience, and a genuine passion for both food and photography. My transformation didn't happen overnight, but through consistent effort and a willingness to learn from every shot.
My Culinary Classroom Adventures:
I've practiced in countless charming cafes in Lisbon, at bustling food stalls in Mexico City, and even during a local cooking class in Thailand (cost me about $30-$50, best investment ever for both cooking skills and photo opportunities!). Each new environment presented unique lighting challenges and styling opportunities, pushing me to adapt and experiment. I learned to ask the chefs about their dishes, to understand the story behind the ingredients – this connection often translated into more soulful and authentic photographs.
Practical Tips for Continuous Improvement:
- Shoot Everything! Don't just save your efforts for exotic travel meals. Practice on your morning coffee, your home-cooked dinner, or a simple snack. The more you shoot, the better you'll get at understanding light, angles, and composition.
- Experiment Fearlessly: Try new angles, different light sources, and unusual props. Break the "rules" sometimes to see what happens. You'll discover your own unique style.
- Learn from Others: Follow food photographers you admire on Instagram and Tripsora. Analyze their shots: What's their lighting like? What angle did they choose? How did they style the dish? Don't copy, but draw inspiration and adapt their techniques to your own style.
- Critique Your Own Work (Kindly): After a shoot, look at your photos. What worked? What didn't? Why? Be honest with yourself, but don't be overly harsh. Every "bad" photo is a valuable learning opportunity.
- Engage with Your Subject: Before you even pick up your camera, take a moment to appreciate the food. What colors stand out? What textures are interesting? What's the story of this dish? This mindfulness will help you capture its essence.
- Invest (Modestly): While I advocate for using your phone, if you're serious, consider a simple clip-on diffuser for your phone's flash (if you must use it, though still avoid!), or a small, portable LED light panel if you often find yourself in very dark restaurants. These are inexpensive but can make a difference.
My Life-Changing Journey: From Bland to Brilliant
Learning to photograph food like a pro has profoundly impacted my travel experience. It's no longer just about seeing a new place; it's about truly experiencing it through its cuisine and capturing those moments in a way that transports me (and my followers!) back to that table, that market, that street stall. My travel memories are richer, my stories more vivid, and my passion for exploration has deepened. I went from being a frustrated amateur to a confident Tripsora contributor, all thanks to these simple, actionable steps.
Now, every meal is an opportunity for creativity, a chance to tell a delicious story. And the best part? You can do it too. You don't need expensive gear; your smartphone is a powerful tool in your pocket. You just need the knowledge, the practice, and the passion.
---
Now it's your turn!
Grab your phone, find some delicious food, and start shooting. Experiment with light, play with angles, style your dish with intention, and then give it that final polish in an editing app. I can't wait to see what deliciousness you capture!
Share your culinary masterpieces with us using #TripsoraFoodie and tag @Tripsora.
Let's inspire each other to make every meal an Instagram-worthy memory!
---