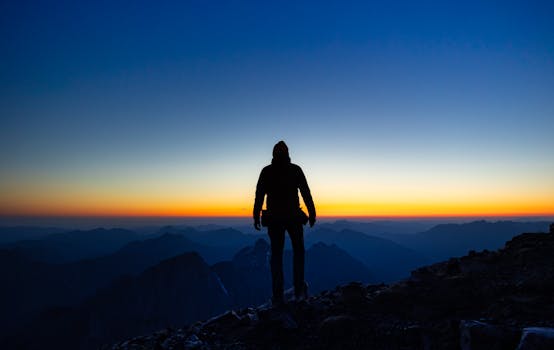
The alarm blares. It’s 3:30 AM. Outside, the world is a canvas of inky black, punctuated only by the distant twinkle of stars. Every fiber of your being screams for five more minutes under the warm duvet. But you push through, because you’re chasing something more profound than sleep: you’re chasing the dawn. Not just any dawn, but a mountain sunrise so spectacular, so untouched, that it feels like the universe painted it just for you.
I've been there, staring at iconic Instagram shots of epic mountain sunrises, only to arrive at the "secret" spot pre-dawn and find myself jostling for tripod space with a hundred other photographers, all trying to capture the exact same, now-not-so-unique moment. It’s disheartening, isn’t it? The magic gets diluted, the authenticity lost in a sea of performative travel.
That’s why I embarked on a personal quest: to find the truly hidden gems, the peaks where the sunrise still feels like a whispered secret between you and the mountain. The places Instagram influencers don't want you to know about, because they're either too hard to get to, too unglamorous for their perfectly curated feeds, or simply too precious to share with the masses. And guess what? I found them.
This isn't just a list; it's an invitation to reclaim the authentic thrill of discovery. It’s about the silent ascent, the biting cold, the anticipation, and that singular, breathtaking moment when the world ignites in a symphony of light and color, witnessed by only a fortunate few. Get ready to swap the crowds for cosmic solitude.
Why Chase the Unseen Sunrise? The Allure of Authentic Dawn
There’s a profound difference between seeing a sunrise and experiencing it. When you’re at a popular viewpoint, the experience can feel transactional: arrive, snap, leave. But on a less-traveled peak, the journey itself becomes part of the spectacle. The quiet trek under starlight, the rustle of unseen wildlife, the feeling of the earth slowly waking up around you – these are the moments that truly embed themselves in your memory, far more than any perfectly filtered photo.
For photographers, these hidden peaks offer unparalleled opportunities. Without the human element dominating the foreground or the distracting chatter, you can truly focus on composition, light, and the raw majesty of nature. You're not replicating an influencer's shot; you're creating your own unique narrative. And honestly, isn't that what travel photography should really be about? Capturing your unique perspective, not just ticking off a checklist of famous spots.
The Gear & The Grit: Essentials for Early Birds
Before we dive into the secret spots, let's talk preparation. Chasing mountain sunrises isn't for the faint of heart or the ill-prepared. You’ll be hiking in the dark, often in cold conditions, and sometimes on challenging terrain.
Your Essential Checklist:
- Headlamp (with fresh batteries!): Non-negotiable. You need both hands free.
- Layers of Clothing: Mountain weather is unpredictable. You’ll be cold waiting, then warm hiking. Think moisture-wicking base layers, a fleece, and a waterproof/windproof outer shell. Gloves and a hat are a must.
- Sturdy Hiking Boots: With good ankle support and grip.
- Backpack: To carry all your gear.
- Water & Snacks: Hydration is key, and a high-energy snack will be a welcome reward at the summit.
- Navigation: Offline maps (e.g., Maps.me, AllTrails Pro) on your phone, and ideally a physical map and compass as a backup. Know your route!
- First-Aid Kit: Blisters, cuts, sprains – be prepared.
- Power Bank: For your phone and camera batteries. Cold drains batteries fast.
- Camera Gear:
- Sturdy Tripod: Absolutely essential for sharp low-light shots and long exposures.
- Wide-Angle Lens: To capture the expansive mountainscapes.
- Telephoto Lens: For compressing distant peaks or capturing details as the light changes.
- Extra Batteries: Pack at least two fully charged spares.
- Remote Shutter Release: Minimizes camera shake for sharper images.
- Microfiber Cloth: For cleaning dew or mist from your lens.
Safety First:
Always tell someone your plans, including your route and estimated return time. Check weather forecasts meticulously. If in doubt, don't go. The mountain will always be there another day.
Peak 1: Seceda's Secret Balcony, Dolomites, Italy
The Dolomites are famous, almost too famous. Iconic peaks like Tre Cime di Lavaredo draw hordes. But deep within the Val Gardena, above the charming town of Ortisei, lies Seceda. While the main viewpoint is popular, there’s a secret spot, a natural balcony, that most miss, offering a truly unparalleled, crowd-free sunrise experience over the jagged Odle peaks.
My Story:
I arrived at Rifugio Seceda the evening before, a cozy mountain hut perched high above the valley. After a hearty meal and a few hours of sleep, my alarm dragged me out at 4 AM. The air was crisp, carrying the scent of pine and damp earth. Armed with my headlamp, I followed a faint, unmarked trail I'd scouted the day before, just a short scramble off the main path. The silence was absolute, broken only by my own breathing and the distant jingle of cowbells. As the first hint of orange painted the eastern sky, I reached my perch. Below me, the valley was shrouded in mist, and above, the dramatic, saw-toothed peaks of the Odle group began to glow, bathed in a fiery, otherworldly light. It felt like standing on the edge of the world, a private symphony of light and shadow.
Why it's a secret:
Most visitors arrive by gondola mid-morning, heading straight for the well-known viewpoint. Few are willing to hike in the pre-dawn darkness, or know about the specific, slightly off-trail spot that offers a better, more isolated angle.
Practicalities:
* Location: Seceda, Dolomites, Italy (accessible from Ortisei, Val Gardena).
* Difficulty: Moderate (requires pre-dawn hiking, some scrambling).
* Best Time: Late spring (late May/early June) for wildflowers and snow-capped peaks, or early autumn (September/early October) for clear skies and dramatic light.
* Getting There: Take the Ortisei-Furnes-Seceda gondola (check operating times; for sunrise, you'll need to hike or stay overnight). For pre-dawn access, you must hike up from Ortisei (a challenging 3-4 hour ascent) or, ideally, stay overnight at Rifugio Seceda or another nearby hut.
* Accommodation: Rifugio Seceda (book well in advance!) or hotels/apartments in Ortisei.
* Cost: Gondola ticket (if used) ~€35-40 return. Rifugio stay ~€60-80/night with half-board.
* Permits: None required for hiking.
* Photography Tip: Bring a wide-angle lens to capture the expansive panorama. Look for leading lines in the landscape to draw the eye towards the peaks. Don't forget to capture the "blue hour" just before sunrise for moody, atmospheric shots.
Peak 2: The East Ridge of Mount Batur, Bali, Indonesia
Mount Batur is Bali’s iconic sunrise trek, but it’s notoriously crowded. Imagine hundreds of people jostling on the main summit. The secret? There’s a lesser-known east ridge, often overlooked by larger tour groups, that offers equally stunning views of the caldera lake, Mount Agung, and the emerging sun, but with a fraction of the crowd.
My Story:
My guide, a local farmer named Wayan, met me at 2 AM. Instead of the usual busy trailhead, we took a smaller, less-maintained path through dense jungle. The air was humid, and the sounds of the jungle at night were both eerie and exhilarating. After about two hours of steady climbing, sometimes over loose volcanic rock, we emerged onto a narrow ridge. There were only two other people there. As the sky began to lighten, the silhouette of Mount Agung appeared, majestic and serene, against a backdrop of fiery orange, pink, and purple. Below, Lake Batur shimmered, reflecting the nascent light. The feeling of having this incredible vista almost entirely to myself, while knowing the main summit was packed, was pure bliss. Wayan even brewed me a cup of Balinese coffee right there on the ridge using a small portable stove. Unforgettable.
Why it's a secret:
Most tour operators stick to the established, easier routes. Finding this ridge requires a local guide who knows the less-traveled paths and is willing to take you there.
Practicalities:
* Location: Mount Batur, Kintamani Region, Bali, Indonesia.
* Difficulty: Moderate to challenging (steep ascent on loose volcanic rock).
* Best Time: Dry season (April-October) for clearer skies and less slippery trails.
* Getting There: Hire a local guide from Kintamani or nearby villages. This is crucial for navigating the lesser-known trails safely. Negotiate the route beforehand, specifically asking for the "East Ridge" or a "less crowded route."
* Accommodation: Stay in Kintamani for easy access, or even Ubud (though it's a longer drive).
* Cost: Guide fees typically range from IDR 400,000 - 700,000 (approx. $25-45 USD) per person, depending on group size and negotiation.
* Permits: A local trekking permit/entrance fee (~IDR 100,000) is usually included in guide fees.
* Photography Tip: The volcanic landscape offers incredible textures. Use a wide-angle for the overall scene, but also a telephoto to isolate details of Agung or the lake as the light changes. Look for steam vents for dramatic, moody shots.
Peak 3: Dragon's Tooth Peak (Reinebringen), Lofoten, Norway
Reinebringen in the Lofoten Islands is famous for its panoramic views over Reine, but even it gets crowded. The true secret lies in finding specific, slightly higher vantage points along the ridge, or, for the truly adventurous, tackling the more challenging "Dragon's Tooth" (a local, unofficial name for a specific, spiky outcrop) for a unique, unobstructed perspective. This is less about finding an entirely different peak, and more about finding a different, harder-to-reach spot on an already stunning mountain.
My Story:
The hike to Reinebringen is no joke, even with the stone steps built by Nepalese sherpas. I started my ascent at midnight in late June, taking advantage of the endless "golden hour" of the Arctic summer. The sun barely dipped below the horizon before beginning its ascent again, painting the sky in a continuous, ethereal glow. Instead of stopping at the main viewpoint, I carefully traversed a narrow, exposed section of the ridge, scrambling up towards a sharp, rocky outcrop that felt like the tooth of a sleeping dragon. The reward was immense: a completely isolated view of the fishing village of Reine, nestled amongst the fjords, bathed in the soft, perpetual light. The air was still, the water below a mirror. It was a moment of profound solitude in one of the world's most dramatic landscapes.
Why it's a secret:
The final scramble to the "Dragon's Tooth" is challenging and exposed, deterring most casual hikers. It requires sure footing and a head for heights, making it a natural filter for the crowds.
Practicalities:
* Location: Reinebringen, Lofoten Islands, Norway (near the village of Reine).
* Difficulty: Strenuous (steep ascent, some scrambling on exposed terrain for the "Dragon's Tooth" extension). Not for beginners or those with vertigo.
* Best Time: Mid-June to mid-July for the midnight sun experience (no "sunrise" per se, but endless golden hour). Late May or late August/early September for more traditional sunrises/sunsets and fewer crowds.
* Getting There: The trailhead is just outside Reine. Parking can be challenging in peak season.
* Accommodation: Cabins (rorbuer) in Reine are iconic, but book well in advance. Camping is also popular.
* Cost: Free to hike. Accommodation can be expensive.
* Permits: None required.
* Photography Tip: Bring a wide-angle lens to capture the vastness of the fjords and the charming village. A drone (check local regulations!) can offer unparalleled perspectives of the "Dragon's Tooth" itself. Be mindful of the light, which can be very soft and diffused during the midnight sun period.
Peak 4: The Ancient Watchtower of Jebel Saghro, Morocco
Forget the crowded Sahara dunes for sunrise. For a truly unique, rugged, and culturally rich mountain sunrise, head to the Jebel Saghro massif in Morocco's Anti-Atlas mountains. This lunar-like landscape, dotted with ancient kasbahs and inhabited by nomadic Berber tribes, offers sunrises that feel like stepping back in time. My secret spot was a remote peak overlooking the Bab n'Ali rock formations.
My Story:
My journey began in the small town of Nkob, where I hired a local guide and a muleteer. We trekked for two days, sleeping under a canopy of stars, sipping sweet mint tea with Berber nomads, and crossing vast, silent plains. On the morning of our third day, we began our pre-dawn ascent to a nameless peak my guide called "The Ancient Watchtower." The air was cold and dry, carrying the scent of desert herbs. As the sun crept above the horizon, it cast long, dramatic shadows across the surreal rock formations of Bab n'Ali, transforming the landscape into a painter's dream. The silence was profound, broken only by the wind whispering through the rocks. It was a sunrise that connected me not just to nature, but to millennia of human history etched into that rugged land.
Why it's a secret:
Jebel Saghro is off the main tourist circuit. It requires multi-day trekking with local guides, making it inaccessible to casual tourists and thus preserving its raw, untouched beauty.
Practicalities:
* Location: Jebel Saghro Massif, Anti-Atlas Mountains, Morocco (accessible from Nkob or Taghbalt).
* Difficulty: Challenging (multi-day trek, some steep sections, remote).
* Best Time: Autumn (October-November) or Spring (March-April) to avoid extreme summer heat and winter cold.
* Getting There: Fly into Ouarzazate, then take a grand taxi or bus to Nkob. From Nkob, you must hire a local, licensed guide and often a muleteer for supplies.
* Accommodation: Wild camping or staying in basic gites/homestays in Berber villages.
* Cost: Guide and muleteer fees vary but expect around €50-80 per day for a guide, plus muleteer and food costs.
* Permits: No specific permits for hiking, but a registered guide is highly recommended for safety and cultural respect.
* Photography Tip: The golden light on the red rock formations is incredible. Focus on contrasting light and shadow, and use a wide-angle to capture the vastness. Don't forget to capture the cultural elements – the nomadic tents, the kasbahs, the faces of the Berber people (with permission!).
Peak 5: Black Tusk's Shadow, Garibaldi Provincial Park, British Columbia, Canada
Black Tusk is an iconic, ominous volcanic plug visible from Whistler. While many hike to its base or past it, the secret for sunrise photography isn't the Tusk itself, but the specific vantage point from a lesser-known ridge overlooking Garibaldi Lake and the Tusk’s reflection. It involves an overnight stay at a backcountry campsite, ensuring you’re perfectly positioned for dawn.
My Story:
I’d backpacked the 18km into Garibaldi Lake the previous afternoon, setting up camp at the designated site. The air was crisp, and the deep turquoise of the lake was mesmerizing. My alarm went off at 4:30 AM. After a quick cup of instant coffee, I hiked about 30 minutes up a small, unmarked side trail I'd scouted the day before, away from the main trails. I found a flat rock overlooking the lake, with Black Tusk perfectly framed. As the sun finally crested the distant peaks, it lit up the Tusk's jagged silhouette, casting a fiery glow that reflected perfectly in the still waters of Garibaldi Lake. The entire scene was bathed in a soft, ethereal light, and the only sounds were the gentle lapping of the lake and the distant call of a loon. It was a truly Canadian wilderness sunrise, untamed and utterly breathtaking.
Why it's a secret:
It requires an overnight backcountry permit and a willingness to hike slightly off the main paths pre-dawn. Most day-hikers don't make it to this specific spot at that time.
Practicalities:
* Location: Garibaldi Provincial Park, British Columbia, Canada (access via Rubble Creek trailhead near Squamish/Whistler).
* Difficulty: Strenuous (18km hike into the lake, then a short pre-dawn hike to the viewpoint). Requires overnight backpacking.
* Best Time: Late July to early September for snow-free trails and warmer temperatures.
* Getting There: Drive to the Rubble Creek trailhead. From there, it's an 18km hike to Garibaldi Lake campsite.
* Accommodation: Backcountry camping at Garibaldi Lake or Taylor Meadows (reservations essential and competitive). No other accommodation options.
* Cost: Park entrance is free, but backcountry camping permits are ~$10 CAD per person per night (reservations made via BC Parks website).
* Permits: Mandatory backcountry camping permits. Book months in advance, especially for weekends.
* Photography Tip: A wide-angle lens is perfect for capturing the lake and the Tusk. Look for reflections in the water. Use a polarizing filter to reduce glare on the lake and enhance colors.
Your Turn: Reclaim the Magic of Dawn
The allure of these hidden peaks isn't just about the photos; it's about the experience. It's about earning that view, feeling the solitude, and connecting with nature on a profound level that crowded viewpoints simply can't offer. It’s about creating memories that truly last, not just content that fades with the next scroll.
So, pack your bags, lace up your boots, and set that early alarm. These mountains are calling, waiting to reveal their secrets to those brave enough to seek them out. Don't let the influencers dictate your adventure. Go find your own magic.
Which peak will you conquer first? Have you discovered a secret sunrise spot that influencers haven't "ruined" yet? Share your thoughts and your own hidden gems in the comments below! Let's build a community of authentic sunrise chasers.
---